As an Amazon Associate, we earn from qualifying purchases. Some links on this site are affiliate links at no extra cost to you. Our recommendations are based on thorough research and editorial judgment.
The Differences Between Oil Pastels and Soft Pastels
When comparing oil pastels and soft pastels, we notice key differences in texture and application. Oil pastels are creamy and vibrant, thanks to their oil and wax binder, making them ideal for bold strokes and layering. In contrast, soft pastels are powdery and require careful blending for soft edges. They excel on textured surfaces, while oil pastels work well on multimedia surfaces. Understanding these characteristics will help us use each medium effectively. There’s much more to explore about both.
Key Takeaways
- Oil pastels have a creamy texture suitable for thick applications, while soft pastels are powdery for easy blending and smooth gradations.
- Oil pastels produce no dust, making them less messy compared to soft pastels, which create dust particles during use.
- Oil pastels maintain vibrancy over time and can be layered over other media, while soft pastels may fade without proper fixing.
- Blending oil pastels often requires additional tools, while soft pastels allow for easier blending with fingers or basic tools.
- Ideal surfaces for oil pastels include textured canvases and glass, whereas soft pastels perform best on textured pastel paper.
Key Differences Between Oil Pastels and Soft Pastels
You may be interested


When you’re deciding between oil pastels and soft pastels, it’s easy to feel overwhelmed by all the differences. You might wonder, how do they actually affect your art? Well, here’s the scoop: oil pastels have this creamy texture thanks to their oil and wax binder, which gives them a unique feel. On the other hand, soft pastels are powdery, stemming from a gum binder that leads to a completely different application experience.
So, what does this mean for how you create? If you’re looking to add some heavy layers and bold strokes, oil pastels are your best bet. They really shine in that area. But if soft edges and smooth gradations are more your style, then soft pastels might just be your ideal medium. The blending technique also puts the two at odds. With oil pastels, you’ll often need tools or solvents to blend effectively. In contrast, soft pastels allow for easy blending with just your fingers—how cool is that?
Color vibrancy is another factor to consider. Honestly, oil pastels keep their colors bright and lively over time. Soft pastels can fade without proper fixing, so that’s something to keep in the back of your mind. This all boils down to what effects you want to achieve in your artwork. Additionally, understanding surface compatibility can help you choose the right medium for your project and ensure better adherence and finish.
Oil Pastels vs Soft Pastels: Characteristics and Uses

Choosing between oil pastels and soft pastels can feel a bit overwhelming, especially if you’re just getting started with art. So, which one should you go for? Let’s break it down.
Oil pastels are pretty unique because they’re made from a blend of oil and wax. This combination gives them a creamy texture, making it easy to get those bright, bold colors on the page. You can apply them thickly or layer them over acrylic paints, which opens up a lot of creative possibilities. They hold their vibrancy over time, so you won’t have to worry about your artwork losing its punch.
On the other hand, soft pastels are all about pure pigment combined with a gum binder. They have a powdery feel that allows for smooth blending, which is great if you’re working on textured surfaces. Honestly, soft pastels can require a bit more control, especially when you’re trying to master blending and layering.
Here’s the trick: if you’re a beginner, oil pastels might be the way to go. They tend to be less frustrating, thanks to their forgiving nature. Soft pastels can be a little trickier, and they do need some extra steps to protect your artwork since they can fade over time.
So, what’s the takeaway here? If you want bold colors and easier application, oil pastels could be your best bet. If you’re ready for a bit of a challenge and love that blending effect, soft pastels might just be calling your name.
Also, when working with oil-based materials, it’s worth noting the importance of pigmentation and coverage power for achieving vibrant and lasting results.
What’s your next artistic adventure going to be?
Sensory and Application Differences: Texture and Consistency of Oil and Soft Pastels

Have you ever wondered why some artists seem to create magic with their pastels, while others struggle? The difference often comes down to the type of pastels they’re using—oil pastels versus soft pastels. Each offers a distinct experience that can seriously impact your artwork.
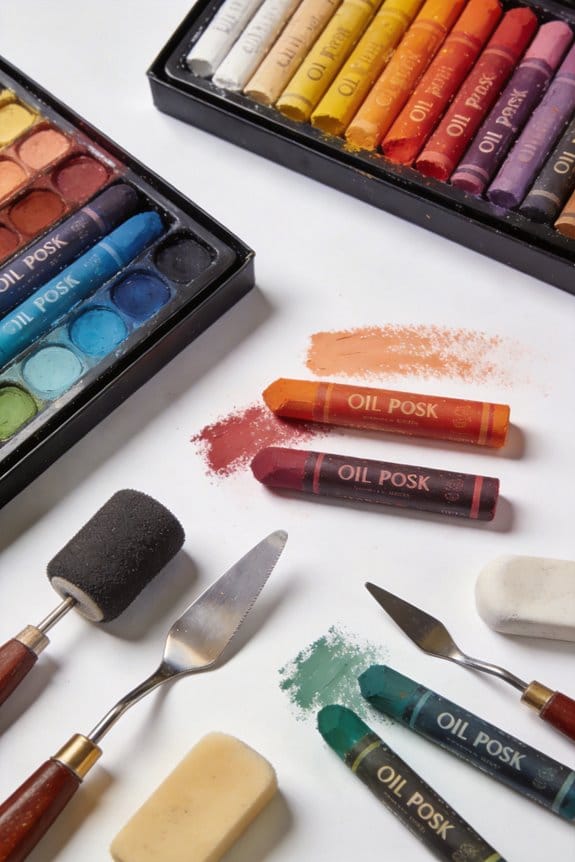
Let’s start with oil pastels. They have this creamy, buttery feel that makes applying color feel almost effortless. You can lay it on thick and achieve those bold, vivid colors that really pop. Because of this smooth consistency, if you like to work with impasto techniques—that’s just a fancy way of saying you like your colors thick—you’ll probably enjoy oil pastels. Plus, there’s no dust to deal with, which is a big plus!
On the flip side, soft pastels have a dry, powdery texture that’s reminiscent of chalk. This gives you softer, velvety effects, especially if you’re layering on textured surfaces. They’re perfect for creating gentle gradients and blending that feels almost like magic. Just keep in mind that they do produce dust as you work, which can be a bit messy.
When it comes to blending, you’ve got options. Some people like to use their fingers or blending tools, but oil pastels often benefit from blenders or solvents to help smooth things out. So, why does this matter? Well, it’s all about finding what feels right for you in your creative process.
To sum it up, oil pastels and soft pastels bring different textures and applications to the table. Each has its charm and can lead you to different artistic outcomes. Which one are you excited to try? For artists using pastels, choosing the right cleaning solution is also important to maintain your tools and ensure optimal results.
Blending Techniques for Oil Pastels vs. Soft Pastels
When it comes to blending techniques for oil pastels and soft pastels, do you ever feel overwhelmed? The methods can differ quite a bit, but with some pointers, you can find what works best for you.
For oil pastels, you’ll want to grab some blending tools like foam blenders or blending stumps. Honestly, sometimes a colorless solvent can do wonders for getting those smooth gradations. On the other hand, soft pastels are a little more user-friendly. You can blend them easily with just your fingers or a simple tool, which makes soft edges a breeze to achieve.
Now, think about layering with oil pastels. It really brings out rich color depth that catches the eye. Meanwhile, soft pastels are great for techniques like feathering and blending, which give you that soft, dreamy look. Each medium has its perks when it comes to creating stunning artwork.
Feeling inspired? Try experimenting with both types. You might just discover a blending technique that feels like your natural style. What methods resonate with your artistic vision?
Also, choosing materials with high-quality, soft cores can greatly enhance your blending experience by providing smoother application and vibrant results.
Best Surfaces for Using Oil Pastels
When you’re diving into oil pastels, picking the right surface can feel a bit overwhelming. You’ve got options—everything from textured paper to slick finishes. If you’re looking for that perfect blend, go for pastel paper with a smooth finish. It really complements the creamy feel of oil pastels, making application smoother and more enjoyable.
But traditional pastel paper isn’t your only choice. Multimedia surfaces offer some great flexibility; they let you layer oil pastels over other materials like acrylics or watercolors. Just remember, always opt for acid-free surfaces. This little detail keeps your work from fading over time, which is key if you want your art to look vibrant for years.
So, what about other surfaces? Canvases, wood, and even glass can be fantastic for oil pastels. The best part is the variety allows you to experiment and find what truly suits your style. Why settle for just one surface when you can explore so many?
For instance, hot press illustration boards provide a smooth texture that supports detailed and layered work, making them an excellent option for oil pastel applications.
In the end, it’s about what works for you and your creative vision. What surfaces have you tried with oil pastels? Keep experimenting, and you might find a new favorite!
Recommended Products

· PREMIUM SELF ADHESIVE FOAM BOARD – Strong, lightweight foam boards with permanent adhesive backing. Ideal for mounting photos, artwork, signs, posters, and craft displays.

MADE IN USA - Hammermill copying and printing paper is 100% made in the USA, helping to support 2.4 million sustainable forestry jobs in America, including family tree farmers. Hammermill is more than just paper. See images.

COPY PLUS PAPER - PERFECT FOR EVERYDAY USE. PAPER WEIGHT: 20 lbs, BRIGHTNESS: 92
Best Surfaces to Use With Soft Pastels
Have you ever struggled to get your soft pastels to really pop on your paper? It can be frustrating when they just don’t seem to stick or blend the way you want. That’s why choosing the right surface is so crucial.
Soft pastels shine on textured surfaces. They need something that really grabs those vibrant pigments and holds them tight. For the best outcome, try using pastel paper designed specifically for this purpose. Its rough grain is like a cozy home for the powdery texture of pastels, which also makes blending a breeze. You can create those beautiful, soft transitions between colors without much hassle.
Feeling adventurous? Consider working on colored paper or cardstock; the contrast can really make your artwork stand out. Cold-pressed watercolor paper is another good option, especially if you’re more experienced. This type of paper allows for layering while still keeping that essential softness that soft pastels are known for.
Don’t forget about acid-free surfaces! They’re key to preserving your artwork over time, preventing fading and degradation. Honestly, taking the time to choose the right surfaces can significantly elevate your soft pastel creations. Using acid-free and archival-quality papers ensures your artwork remains vibrant and intact for years to come.
Techniques to Maximize Your Artwork Using Oil Pastels
Creating stunning artwork with oil pastels can feel like a breath of fresh air when you’re feeling stuck in your creative process. You might be wondering how to take your pieces to the next level without losing the charm of your original vision. Here are some tips to give your oil pastel artwork that extra flair.
First off, layering colors is key. Think about how sgraffito can work wonders; by scratching into layers, you can expose those bright, vibrant shades nestled beneath. This technique adds depth and texture that’s hard to achieve otherwise.
Try blending your oil pastels with a foam blender or even a bit of solvent. It can really soften the edges and give you that smooth, painterly finish, similar to what you’d get with oils. And if you’re after a bold, dynamic look, don’t shy away from applying those pastels thickly. The impasto effect can make your artwork feel alive and impactful.
Another secret? Layering oil pastels over watercolors or acrylics can boost the colors and details in your work. It’s a fun way to add vibrancy that just pops off the page. Plus, using tools like spatulas allows you to break pastel sticks into interesting textures—this could bring your artwork to life in unexpected ways.
Recommended Products

【Ideal Gift Choice for Novice & Expert】From hobbyists to professionals, the unique and posh tool kit bundle sure will be suitable for artists at all levels. No matter you're the beginners, aspiring ones, experienced artists, art students or creative enthusiasts, this is the art supply gift you'll enjoy and be satisfied with.

Features: For charcoal, pencil, and pastel blending, blending with pencil drawings and with oil pastels, and sandpaper to clean off the tips

Soft Pastels: Tips for Great Artwork
Struggling to get those soft pastels to really pop? You’re not alone! Here’s the lowdown on making your artwork stand out.
Start with your lighter colors. This approach isn’t just a suggestion; it’s about building depth. By layering darker shades on top, you can create a rich dimension that’ll make your painting sing. Seriously, the layering technique does wonders for the visual impact of your work.
When it comes to blending, you have options. Want a smooth transition? Use your fingers, blending stumps, or even a brush. The choice is yours! Working on the right paper is also crucial; go for paper designed specifically for soft pastels. It’s like giving your pastels a firm handshake—they’ll stick with you better, leading to brighter and more vivid effects.
Now, here’s the trick for that vibrant look: layering colors is essential. It brings a luminous quality to your final piece that’s hard to replicate. So, don’t shy away from mixing and matching.
Before you finish up, keep in mind how fixatives can change the game. Truth is, it’s smart to test them out on a small strip of your work first. Some fixatives might alter color intensity, and you want your piece to shine just the way you envisioned.
To wrap it all up, remember to start light, layer wisely, and test your fixatives. Using dedicated pastel boxes for storage can also help preserve your pastel sticks and keep your workspace organized.
How have your experiences with soft pastels been? I’d love to hear your thoughts!
Creative Project Ideas for Oil and Soft Pastels
Have you ever felt stuck when it comes to using oil and soft pastels? It can be tricky to know where to start. Mixing these two mediums can open up a world of creativity, and I’ve got some ideas that might just inspire you.
Start by layering oil pastels; they’re fantastic for creating bold colors and shapes. Think about putting together vibrant scenes. Meanwhile, soft pastels are perfect for those softer, dreamy backgrounds. They blend beautifully for smooth transitions. You could even make some unique greeting cards! Soft pastels work well for delicate illustrations, while oil pastels can add some striking lettering or fun accents that really pop.
Try this: step outside the box with mixed media! Use oil pastels on a canvas and pair them with soft pastels on textured paper. You’ll be amazed at how the different surfaces interact, creating depth and interest in your artwork. If you’re into abstract art, blend the thick, textured marks of oil pastels with the gentle gradients of soft pastels. The combination really showcases the strengths of both mediums.
And here’s a fun project to think about: illustrating a storybook. You can create colorful characters that leap off the page and craft gentle, beautiful backgrounds that pull everything together. This balance can really make your illustrations stand out while feeling harmonious.
For an enhanced creative experience, consider using acrylic paints as a base or accent, since they offer surface versatility that complements pastel artwork beautifully.
Recommended Products

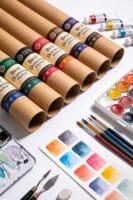
Premium Art Materials: Includes 120 Polychromos artists' color pencils, 120 Albrecht Durer artists' watercolour pencils, 30 Albrecht Durer watercolour markers, 60 Pitt Artist pens with flexible brush nib, 4 Pitt Artist Pens fineliner in black (XS, S, F, M), 2 Pitt Artist Pens with 1.5mm bullet nib, 12 Castell 9000 pencils, 6 Pitt Graphite Matt pencils, 5 Castell 9000 jumbo pencils, 5 Graphite Aquarelle pencils, 3 Pitt Graphite Pure pencils, 3 Pitt Graphite Crayons, 4 Pitt Pastel pencils, 4 Pitt Oil-base pencils, 3 Pitt natural charcoal pencils, 3 Pitt compressed charcoal pencils and various accessories.

Manufacturing process of the Sennelier cylindrical pastel does not compress the paste, and the pastel dries naturally in open air
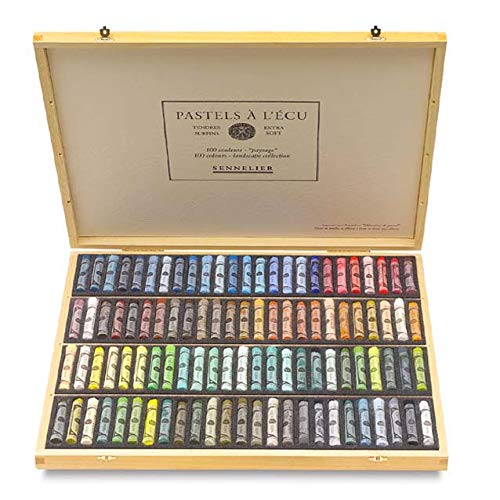
Manufacturing process of the Sennelier cylindrical pastel does not compress the paste, and the pastel dries naturally in open air
Pros and Cons of Using Oil Pastels Compared to Soft Pastels
Choosing between oil pastels and soft pastels can feel like a tough decision, especially when you want to make the best choice for your art. Oil pastels have this creamy texture that gives you vibrant, bold colors. On the flip side, soft pastels are more powdery and perfect for that smooth blending you might be after. One major thing to keep in mind is how versatile each type is. Oil pastels can work on all sorts of surfaces, including glass, while soft pastels tend to shine on textured paper.
But there are a couple of catch-22s to think about. Oil pastels need extra tools if you want to blend them well, and after you’re done creating, you’ll also need an oil-based fixative to preserve your piece’s brightness. Soft pastels are much easier in this respect. You can blend them right with your fingers, and a simple spray fixative will take care of any smudging you worry about.
Additionally, many soft pastels come in non-toxic formulations, making them safe for artists of all ages while providing vibrant colors and smooth blending.
Frequently Asked Questions
What Is Better, Oil Pastels or Soft Pastels?
We believe there’s no definitive answer in the oil pastels vs soft pastels debate; it all depends on our preferences. We favor oil pastels for color vibrancy and texture differences, while others appreciate soft pastels’ blending techniques and usage longevity.
What Is the Rule of 3 in Oil Pastels?
We love using the Rule of 3 in oil pastels! It enhances color blending techniques through layering effects, elevates texture creation, and maximizes color saturation while ensuring lightfastness properties, creating a fascinating medium comparison that transforms our art.
What Type of Pastels Are Best for Beginners?
For beginners, we recommend oil pastels for their ease of use and vibrant colors. They support blending methods, layering effects, and various paper selections, making it enjoyable to explore beginner techniques and create stunning art!
What Are Oil Pastels Best For?
Oil pastels are best for vibrant artwork where we can explore layering oil pastels and blending oil pastels for depth. They pair well with various oil pastel brands and mediums, ensuring versatile creative possibilities.


