As an Amazon Associate, we earn from qualifying purchases. Some links on this site are affiliate links at no extra cost to you. Our recommendations are based on thorough research and editorial judgment.

Understanding Tortillons and Blending Stumps
Tortillons and blending stumps are important tools for artists seeking smooth blends and refined details. Tortillons are small, rolled paper tubes ideal for tight spaces and fine textures, while blending stumps are sturdier and better suited for larger areas. They’re both budget-friendly; tortillons are disposable, and blending stumps can be cleaned. Using them effectively involves circular motions and light pressure. If you’re curious about their care or alternatives, there’s more to explore on how to enhance your artwork.
Key Takeaways
- Tortillons are disposable paper tubes ideal for blending fine details and creating subtle textures in artwork.
- Blending stumps are reusable, double-pointed tools best for larger areas and achieving smooth gradients.
- Tortillons are best for precision, while blending stumps provide a velvety texture for broader surfaces.
- Maintenance of blending stumps involves cleaning with sandpaper or kneaded erasers; tortillons are replaced when dirty.
- Both tools are budget-friendly and should be chosen based on project needs: precision versus smooth finish.
Understanding Tortillons and Blending Stumps: What They Are
You may be interested

Creating beautiful drawings can feel overwhelming at times. Ever wonder how artists achieve those smooth transitions and soft textures? It all comes down to the right tools, and that’s where tortillons and blending stumps come in.
Tortillons are small, tightly rolled paper tubes with pointed ends. They’re perfect for working in tight spaces and blending fine details. You can create subtle textures that really make your artwork pop! Just keep in mind that once they get dirty, there’s no cleaning them. So, you might want to have a few on hand, especially since they usually cost between $1.20 and $1.30 for a pack of six.
On the flip side, blending stumps are your go-to for larger surfaces. These sturdier tools have a double-point design and help you achieve smooth gradients quickly. They’re made from compressed paper, which makes them a bit more durable. The price can vary between $0.84 and $2.45, but they’re definitely worth it for the efficiency they bring to your art.
Here’s the trick: using both tools can really enhance the depth and dimension of your work. If you’re blending larger areas, reach for a blending stump. For those tiny, detailed spots, pull out a tortillon. It’s amazing how much impact the right tool can have!
Truth is, experimenting with these tools can elevate your skills. Have you tried using both in your drawings yet? If not, it might just be the next step in your creative journey. In the end, using tortillons and blending stumps can help you create art that truly stands out. What will you create next with these handy tools? Additionally, incorporating soft pastels with a low-binder formula allows these blending tools to achieve smoother and more vibrant applications.
Key Differences: Tortillons vs. Blending Stumps

Do you ever find yourself struggling to blend your art just right? You’re not alone! When it comes to blending tools, tortillons and blending stumps each have their own strengths, and knowing when to use which can really level up your artwork.
Tortillons are those tightly rolled paper cylinders that come to a sharp point. They’re fantastic for getting into those detailed areas where you need precision. If you’re looking for a quick way to blend, these are your go-to. They work wonders for intricate sections of your piece. On the flip side, blending stumps have a thicker, double-pointed design. They offer a nice, velvety texture that’s perfect for creating smooth gradients, especially in larger areas.
Here’s the trick: blending stumps, made from compressed paper pulp, are a bit more robust. This means they’re easier to clean with a little sandpaper. And while tortillons can get so dirty that you’ll just want to toss them, you can keep using blending stumps over and over again.
Both tools are easy on the wallet, allowing you to improve your art skills without breaking the bank. So, which one should you choose? Consider what you’re working on. Are you after precision or a smooth finish? Understanding these differences will help you pick the right tool for the job.
In the end, whether you go with tortillons or blending stumps, the choice boils down to your project needs. What’s your favorite tool to blend with? For the best results, choosing tools with durable paper materials can enhance longevity and maintain consistent performance.
Recommended Products

The excellent quality chalk-pastel coloring pencils come in up to 60 different shades.
![Creative Mark Double Wire Spiral Bound Field Sketch Book [Pack of 24-5" x 11"], Black Embossed Leatherette Journal, Light Cream Acid-Free Paper, Perfect for Dry Media and Drawing](https://m.media-amazon.com/images/I/413QZ-RX4hL._SL500_.jpg)
Features: Hard and durable embossed black covers, double wire spiral bound Construction, lies flat when opened for table Use, 80 sheets of light cream, 70lb. paper, and micro perforated sheets for easy removal

This magnificent bamboo wood box from Conté à Paris contains an assortment of 70 colored squares, 14 sketching squares, 3 sketching pencils, 1 kneaded eraser, 1 tortillon, and 1 stump, a complete set to meet all artistic needs.
How to Use a Blending Stump Effectively

Using a blending stump can really boost your drawing game if you know how to work it right. Ever struggled with uneven shading or harsh lines? It happens to the best of us! To get started with blending, try dragging the stump in small circles. This technique is super effective for creating soft textures in areas like shrubs or leaves.
Now, if you’re aiming for smooth shading, here’s a handy tip: scribble on some scrap paper first. This little trick helps transfer graphite evenly onto your stump, so you won’t end up with dark patches in your artwork. When you actually start blending, remember to apply light pressure and move the stump back and forth gently. You’ll find that this approach gives you those cohesive tones we all want, without leaving smudged edges.
For those darker spots in your artwork, rubbing the stump gently over the grooves can really make a difference. It helps minimize those pesky white dots that can pop up. Keeping your blending stump clean is a must. Honestly, nobody wants to deal with grimy tools. Sandpaper works wonders for sharpening and cleaning the tips, ensuring you get the best results every time. Using a blending stump along with other additional drawing accessories like kneaded erasers can greatly expand the shading range and detail in your drawings.
Recommended Products

150 piece art set comprising of oil, acrylic and watercolour disciplines.

TAILORED DRAWING KIT - A variety of drawing pencils, pastels and tools in a beautiful presentation sure to be appreciated by tween to adult artists of all skill levels.
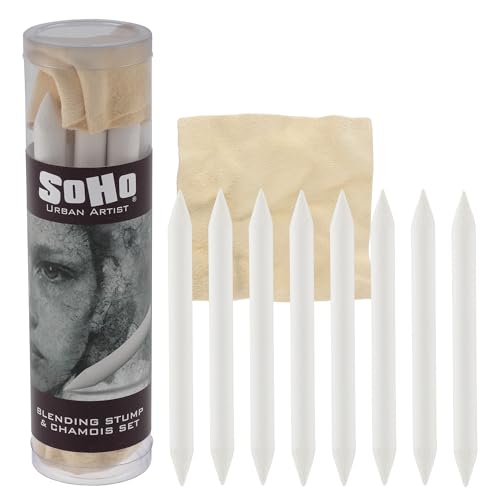
Complete 8-Piece Blending Set – Includes 8 professional-quality blending stumps in multiple sizes and a 4"x4" soft chamois cloth for a full range of shading techniques
Tips for Using Tortillons: Blending Tools for Detail Work
Are you struggling with those fine details in your artwork? Blending tools can really enhance your work, especially when you need to add precision. Tortillons are perfect for this. Their pointed ends make it easy to blend in tight spots where other tools might miss the mark.
When you dive into detail work, it’s smart to keep a separate tortillon for each tonal range. This way, you won’t accidentally smudge dark tones into your lighter areas. Adjusting your pressure as you blend can create different textures too—adding depth and interest to your art. Tortillons are made from tightly rolled paper, giving you more control than blending stumps, which is something to consider.
So, what do you do when your tortillons get dirty? Honestly, they’re disposable! When they’re not giving you the results you want, it’s time to toss them. To get the best results, try selecting your tortillons carefully and practice using them in specific areas of your work. This will really help maximize your blending capabilities.
In short, tortillons can be a great tool in your art supply kit. Give them a shot next time you’re working on the finer details—what do you have to lose? Remember that using blending tools like stumps greatly improves smooth transitions and shading effects in charcoal artwork.
Recommended Products

Features: For charcoal, pencil, and pastel blending, blending with pencil drawings and with oil pastels, and sandpaper to clean off the tips

Complete Set: Includes blending stumps, tortillons, silicone cup, erasing shield, tape, sanding block, pencil extender and storage box, offering 20 essential pieces for sketching, shading and detailed artwork
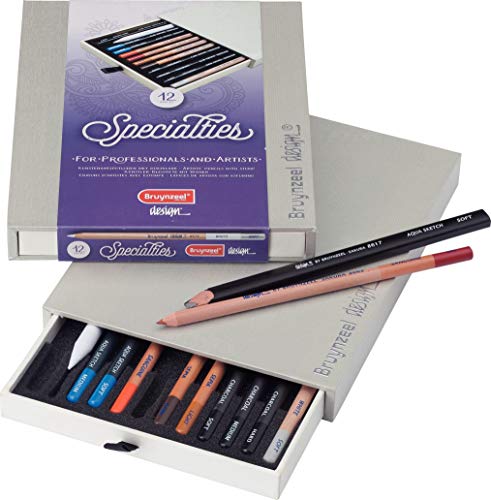
Exclusive set with 12 assorted Bruynzeel Design Specialties including Aqua-Sketch, charcoal, sanguine (oil), sepia, white and a blending stump (tortillon). Comes in a sturdy, reusable storage box with inlay to keep your tools perfectly organized and protected
How to Clean and Maintain Your Blending Tools
Have you ever wondered why your blended artwork doesn’t come out quite right? Keeping your blending tools in tip-top shape can make all the difference.
When it comes to cleaning a blending stump, you don’t need to worry—it’s pretty straightforward. Simply rub the tip with a kneaded eraser or lightly sand it with fine sandpaper. This will get rid of any graphite buildup and make sure your tool is doing its best work. For a more thorough clean, you can grab an Exacto blade. Carefully shave the tip, but be gentle—you want to keep the tool intact.
Now, let’s talk about blending tortillons. These little guys are tightly rolled paper, which means cleaning them isn’t really an option. Once they’re dirty, it’s time to replace them. Keeping a few on hand is a smart move; they really do wear out quickly.
So, why does this matter? Regularly maintaining your tools, like cleaning and sharpening, helps you draw those smooth gradients you’re aiming for. A good tip? Consider setting aside different tools for dark, medium, and light shades to avoid any cross-contamination of colors. For organizing your art space, using adjustable tabletop easels can also help keep your displays neat and accessible.
Make Your Own Blending Tools: DIY Stumps and Tortillons
Have you ever run out of blending tools when you’re deep into your art project? It can be frustrating! But don’t worry—making your own blending tools is easier than you might think.
To whip up a DIY tortillon, just grab a small sheet of scrap paper. Roll it tightly into a slender cylinder, and sharpen one end for those detailed blending areas. This gives you great control when you’re working on those tight spots in your artwork. For blending stumps, take a strip of paper and roll it into a cylindrical shape. You can decide how big or textured you want it to be.
The best part is this method doesn’t break the bank and lets your creativity shine. Homemade tools might not hold up as long as the ones you buy in the store, but they sure allow for playful experimenting. Just keep an eye on their condition; once they start to wear down and lose effectiveness, it’s time to make some new ones. To preserve the quality of your artwork, consider using high pigmentation paints for vibrant and lasting results.
Recommended Products

🎨 【Prefessional Handmade Soft Pastel】 Each of Paul Rubens's soft pastel is made of pure pigment and nature adhesives in a specific ratio. It is hand-rolled which will give the pastels a top-quality texture of smoothness and softness, easy to work with on all types of pastel papers.

Prefessional Handmade Soft Pastel: Each of Paul Rubens's soft pastel is made of pure pigment and nature adhesives in a specific ratio. It is hand-rolled which will give the pastels a top-quality texture of smoothness and softness, easy to work with on all types of pastel papers
![Creative Mark Blending Stumps - Solid Double-Ended Blending Stumps for Blending Charcoal, Pencils, Pastels, and More! - [Size # 8-72 Count]](https://m.media-amazon.com/images/I/41BhLCWbDwL._SL500_.jpg)
Features: Sturdy, soft felt paper, variety of sizes and a set, clean and sharpen on a sanding block, and a traditional double-ended design
Avoid These Common Blending Mistakes
Have you ever noticed that your blending can sometimes end up looking…well, flat? It’s a common pitfall that many artists fall into, leading to a muddy appearance that zaps away the depth of your artwork. One big mistake is over-blending. It might feel satisfying to keep going, but that can make your piece look lifeless.
Don’t forget to check the cleanliness of your blending tools. If they’re dirty, they can leave unsightly dark smudges in your lighter areas—definitely not the look you’re going for! And when you’re blending, think about the pressure you’re applying. Irregular pressure can create harsh lines instead of those beautiful, smooth gradients we all want. You want to aim for consistency here.
Taking a moment to consider the texture of your paper is also crucial. It directly affects how much graphite will stick. Some paper types just absorb it differently, and knowing that can really help in achieving the right look. Regular cleaning and sharpening of your tools is another tip worth mentioning. Keeping them in top shape maintains their performance and can even extend their life. Additionally, choosing high pigmentation paint can ensure your colors remain vibrant and don’t get lost in the blending process.
Are There Alternatives to Traditional Blending Tools?
What do you do when your usual blending tools aren’t giving you the results you want? There are actually quite a few alternatives to consider!
Tissues can be great for blending lighter to mid-tones, but be careful—they might leave some graphite on those darker spots. Instead, think about reaching for makeup brushes. Those with stiff, soft bristles work wonders for creating smooth blends without dragging in any dark colors. If you’re working on a bigger area, Q-tips can be pretty handy. Just keep in mind, you might need to tweak them a bit for small details.
And let’s talk about chamois. These soft leather pieces are fantastic for blending charcoal and pastels since they absorb well. You might have heard some folks suggest using their fingers, but truth is, that can lead to a mess. The natural oils from your skin can smudge your artwork, so sticking to more reliable tools keeps your work looking sharp.
For more consistent and comfortable blending experiences, consider using brushes with ergonomic handle designs that reduce hand fatigue during use.
Recommended Products

COMPLETE PROFESSIONAL WORKSTATION: The ultimate "Business in a Box" for MUAs. Includes 24 x 32g cakes, 2 massive 90g base colors, 5 large 50g split cakes, and 3 one-stroke cakes for infinite design possibilities. A trusted, global favourite for 15+ years.

Include: 36 bags of Plastic Ivory Pearl Beads Vase Filler. About 144 pearls per bag, no holes, approximately total 36 LBs, or Approximately Total of 9,720 Pearl Beads. Individual Pearl Bead Size 18 mm.
✔【Unique Beveled Design & Easy Maintenance】Our designer has broken the tradition by adding beveled designs to the edges of both the frame and the mirror, giving it a sleek look. The gap set between the len and frame makes the mirror appear suspended, creating a 3D effect. The premium brushed metal frame ensures it won't rust. The brushed finish not only provides a smooth touch but also makes the mirror be easy to clean.
Frequently Asked Questions
What’s the Difference Between Blending Stump and Tortillion?
Blending stumps and tortillons differ in tool materials and texture, affecting our blending techniques. We often choose based on artist preferences: stumps for larger areas, tortillons for detailed work in various drawing mediums.
How to Use Blending Stumps and Tortillons?
To use blending stumps and tortillons effectively, we recommend mastering blending techniques for smooth shading and drawing textures. Experiment with different shading methods, and remember our sketching tips to maintain clean, defined areas in our artwork.
What Is the Difference Between a Blending Stump and a Tortilla?
A blending stump isn’t a tasty snack; it’s an artist’s tool for smooth shifts, while a tortillon, made from similar materials, offers detailed precision. Let’s master these drawing accessories without accidentally ordering lunch!
What Are Stumps and Tortillions Used For?
Blending stumps and tortillons are essential art supplies we use for smoothing pencil shading and enhancing charcoal techniques. They help us achieve seamless changes and detailed textures in our drawings, elevating our artistry.


