As an Amazon Associate, we earn from qualifying purchases. Some links on this site are affiliate links at no extra cost to you. Our recommendations are based on thorough research and editorial judgment.

Upcycling Jars and Containers for Studio Storage
Upcycling jars and containers for studio storage is a smart way to organize and declutter our creative spaces. We can easily clean jars using hot, soapy water to remove any residue or labels. After that, we can personalize them with spray paint or adhesive stencils for labeling. These sturdy glass containers can store beads, clips, or even craft supplies, enhancing our productivity. Join us as we explore more ideas to transform your jars into functional storage solutions.
Key Takeaways
- Upcycled jars offer eco-friendly storage solutions, reducing waste while providing sturdy and reliable organization for studio supplies.
- Transparent glass jars enhance visibility, making it easier to access and manage various materials and tools used in the studio.
- Customize jars with spray paint and adhesive stencils to match the studio’s aesthetic and create a cohesive look in your workspace.
- Stackable jars save space, allowing for efficient storage of crafting items like paints, brushes, and small tools in a compact area.
- Regular cleaning and maintenance of upcycled jars ensure they remain functional and fresh, contributing to a pleasant and organized studio environment.
Why Upcycling Jars Benefits Your Studio
You may be interested


When it comes to organizing your studio, have you ever considered upcycling jars? They can be a real lifesaver! Glass jars are not only eco-friendly—they cut down on waste—but they also provide sturdy and reliable storage options. Unlike plastic containers that can warp over time or absorb unwanted smells, glass jars keep your art supplies safe, whether it’s brushes, paints, or glitters.
Think about it: their airtight lids are perfect for keeping powders and adhesives fresh and dry, so you don’t have to worry about them spilling or clumping. Plus, the transparency of glass means you can quickly see what’s inside each jar without having to open them all. This can seriously save you time when you’re in the zone working on a project.
Here’s the trick: to really make the most of these jars, clean them out well and maybe even give them a fresh coat of paint for that personal touch. Organize them by color, type of supply, or even by project, and watch how your workspace transforms. You might even find that grouping similar items together sparks new ideas for your next creation!
The best part is that using upcycled jars not only makes your studio look better, but it’s also a step towards being more environmentally mindful. Ever considered how your workspace reflects your values? Embracing eco-friendly practices can feel rewarding, especially when your space is both organized and visually appealing.
In short, upcycling jars is a win for your studio and the planet. For even more efficient organization, consider incorporating paint organizer racks that can accommodate a variety of art supplies and bottle sizes. What other creative ways have you found to stay organized?
Gather Essential Materials to Transform Your Jars

Have you ever looked at a pile of mismatched jars and thought there must be a better way to organize them? Transforming your jars into beautiful storage solutions isn’t just a fun project, but it can also help declutter your space. Let’s dive into the essential materials you’ll need to get this done.
First off, think about the jars themselves. You want designs that fit your needs, whether it’s something stackable for efficient storage or a classic shape like those Talenti gelato jars. They’re not just cute; they’re practical too!
Next, gather your tools. Here’s what you’ll want to have on hand:
- Spray paint in different colors to give your jars a fresh look.
- Adhesive stencils for labeling your jars—get creative with it!
- Craft paint for adding a unique touch to the lids.
- Clear packing tape to help protect your labels.
- Protective gear, like a mask, is really important when using spray paint.
Honestly, you don’t want to skip this step. And don’t forget about your workspace! Lay down some newspaper or a drop cloth to keep your area clean.
To ensure your storage solutions last, consider using durable materials that offer resistance to moisture and damage.
So, why does this matter? Having the right materials means you’ll feel more prepared and excited to start the transformation. You’ll be pleased with how nice your jars can look while being functional!
Once you gather everything, you’re really set for a wonderful DIY session that’ll spruce up your studio storage. Remember, a little effort goes a long way in making your space feel organized and inviting. Ready to get started?
Recommended Products
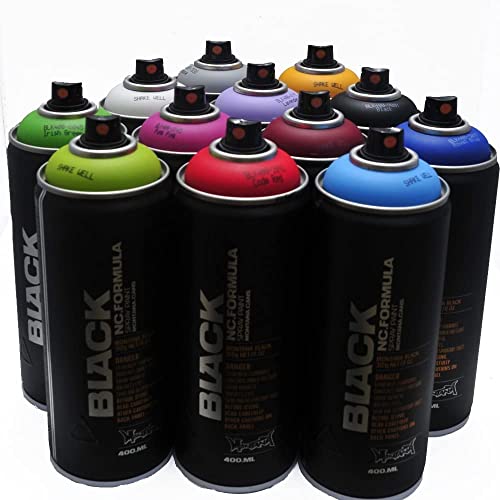
Set of 12 Montana Black 400ml spray paint cans

Works on natural (absorbent) and synthetic (non-absorbent) fabrics and allows the weave of the fabric to show for a more natural appearance

ARTS AND CRAFTS SPRAY PAINT! Looking for an ultra matte water-based spray paint set that is perfect for arts and crafts? Then try our Aqua Mini Spray Paint Set! Our miniature 4.2oz cans are a muted pastel color that is low odor and environmentally friendly.
Fun Ways to Clean and Prep Your Jars

Cleaning and prepping jars for upcycling is a must-do step if you want your projects to shine. Ever find yourself wrestling with wax residue? Here’s a trick: pop those jars in the microwave for a short burst. It makes it way easier to wipe the wax off with a paper towel. If the wax is still being stubborn, soaking the jar in hot water does wonders.
After you’ve tackled the wax, it’s time to focus on the insides. You’ll want to wash them down with warm, soapy water—don’t skimp on using a Scotch-Brite scrubber to really get rid of all the sticky bits. And let’s not forget about the lids! Make sure to clean them thoroughly too. Once everything’s scrubbed down, dry it all off completely. No one wants mold popping up later, right?
The good news is that these simple, eco-friendly cleaning methods get your jars prepped for whatever creative adventure you’ve got in mind. So, what’s the next project you’re planning to use those jars for? Time to get them ready! Choosing containers made from rust-resistant materials can help your storage last longer.
Recommended Products

Scratch-Free Cleaning – Gently removes tough, burnt-on food from glass cooktops without scratching. Micro-texture scrubbing surface safely cleans glass and ceramic stovetops while leaving a smooth, streak-free finish.

TWENTY SCOURING PADS: This pack of Scotch-Brite Zero Scratch Scour Pads includes two scrub pads for dishes

Pack of 4 (NOT 44)
Creative Painting Ideas for Personalizing Your Jars
Are your jars looking a bit bland and in need of some love? Personalizing them can easily turn them into unique storage solutions or eye-catching decor. One fun way to begin this journey is using chalk paint. It goes right onto glass without any fuss of a primer.
Here’s where it gets interesting: you can play around with color mixing to create beautiful gradient effects. Just swirl the paint around inside the jar, and watch the magic happen! Another technique to consider is adding texture. By layering on multiple coats of chalk paint and then gently sanding random areas, you can achieve a lovely distressed look that gives character.
For those who enjoy drawing, painting flowers or abstract shapes with acrylic paint pens can add a personal touch. Picture a bright bloom or an artistic swirl sitting on your shelf! The best part is that once you’re happy with your designs, sealing everything with a varnish or Deco Podge will protect your artwork and help it last longer. To ensure your designs are vibrant and long-lasting, consider using quick-drying and fade-resistant acrylic paint pens for superior results.
Recommended Products

CHALK MINERAL PAINT – Coffee Bean is a rich, dark brown and black chalk mineral paint. This espresso color can anchor any space and add a warm, inviting feel. Our chalk mineral paint is ideal for wood, metal, plastics, brick, stone, glass, concrete, and so much more. Coffee Bean is versatile – use as a base or style it with something bright. Use this cozy color in your traditional living room or shabby chic bedroom. An 8oz container of this paint should cover about 38 sq. ft.


Transform Any Surface into a Creative Canvas: Turn furniture, walls (bedroom, living room, kitchen), and old classroom boards into sleek chalkboard surfaces. Perfect for DIY art decals, kids' poster boards, bistro-style menus, calendars, and magnetic bulletin boards—unleash endless creativity!
How to Customize and Label Your Jars
Have you ever stared at your collection of jars and thought, “What a mess!”? Personalizing and labeling jars can transform clutter into organized beauty, but where do you even start? Let’s dive into practical tips to make your jars not only functional but also a reflection of your unique style.
Start by considering different labeling techniques. One fun method is to print labels on cardstock and seal them with Mod Podge. It gives your jars that polished look everyone loves. Or, if you’re feeling crafty, try tracing text with a fine-point Sharpie paint pen; it creates clean, neat lines that make your jars stand out.
Another quirky idea to think about is using flat toilet paper rolls as labels. Believe it or not, they can be a simple and sustainable option. Just cut them to size, decorate, and attach them to your jars. Personal touches like these aren’t just practical; they show off your creativity and eye for design.
So, why does this matter? Well, not only do your jars serve a purpose, but they also enhance your space. Plus, embracing eco-friendly practices by using materials you already have can make the process even more rewarding.
To wrap it up, customizing your jars can elevate both their utility and aesthetics. Try these ideas out and let your creativity flow! What’s your favorite way to personalize your storage?
When organizing your craft space, incorporating storage and portability solutions can make your workflow even smoother.
Recommended Products

Blank White Matte Sticker Paper- printable sticker paper for laser & inkjet printer. non-yellowing, smudge-proof - permanent - 8.5" x 11" - full sheet - 1 label per sticker sheet paper

3" round white matte labels (5,000 sheets – 30,000 labels): Printable medium white circle stickers with a matte finish for full-color customization; six labels per 8.5" x 11" sheet; compatible with inkjet and laser printers
![NefLaca 2"x4" Shipping Address Labels, 10-UP Blank Mailing Labels, White Self-Adhesive Customized Stickers for Inkjet and Laser Printer [5000 Sheet, 50000 Labels]](https://m.media-amazon.com/images/I/41DpQKreVcL._SL500_.jpg)
【Easy to Peel Off】 2" x 4" 10 up Mailing Address Labels with rectangular paper material, this address label each sheet has the margins pre-peeled so you can easily remove the labels without tearing. Label Size: 2" x 4".
Unique Storage Solutions With Upcycled Jars
Are you drowning in crafting materials or office supplies with no idea where to put them? Upcycling glass jars could be the perfect solution to help you organize your space, and it can be a fun project, too.
Think about it: glass jars from sauces can stack nicely, making them great for storing all sorts of crafting goodies. You can even grab some spray paint to customize them in colors that match your space. Whether it’s wood beads or paper clips, these jars can hold it all. Need to tidy up those tiny items? Smaller jars—like those cute Oui yogurt containers or votive jars—work wonderfully to keep everything organized and neat.
Here’s the trick: mason jars don’t just need to be for canning. They can also turn into practical holders for things like soap or spices. It’s amazing how a little creativity can transform everyday items into both functional and stylish storage solutions.
So, why does this matter? Creating order out of chaos not only enhances your space but can also boost your productivity when you can find what you need, when you need it. Consider combining these jars with a rolling utility cart to maximize storage and mobility in your creative studio.
Recommended Products
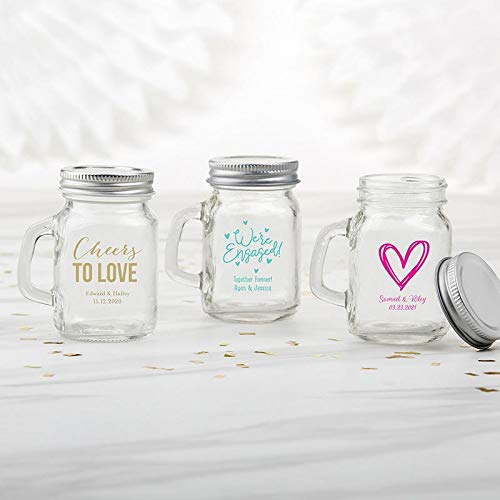
Perfect decoration or party favor - not only do these adorable mini mason mug shot glasses make a wonderful take home gift for your guests at weddings, showers or parties; They are also perfect for serving shots, small drinks, desserts, sauces and more!
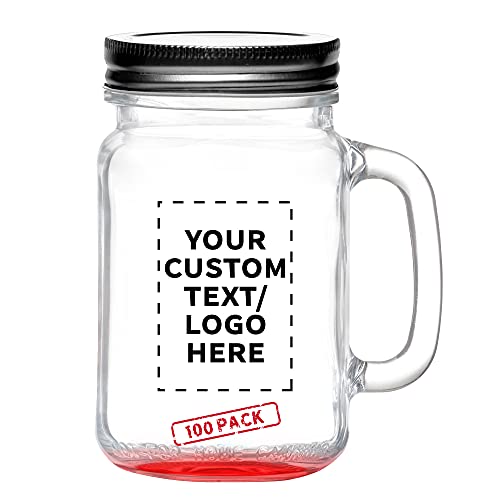
DURABLE - These 16 oz. Libbey mason jars are made of high quality durable material making them perfect for your favorite sweet tea, cold glass of water, or even a ice cold brew. These glass mason jars would be a perfect addition to your restaurant or bar.

DURABLE - These 16 oz. Libbey mason jars are made of high quality durable material making them perfect for your favorite sweet tea, cold glass of water, or even a ice cold brew. These glass mason jars would be a perfect addition to your restaurant or bar.
Tips for Maintaining Your Upcycled Jar Storage System
Maintaining your upcycled jar storage can feel overwhelming at times, but it doesn’t have to be. Ever dealt with stubborn labels that just won’t come off? A simple soak in hot, soapy water often does the trick. If you still find remnants hanging on, a bit of vegetable oil can work wonders to help remove those last bits. And don’t forget about odors! Filling jars with baking soda helps neutralize any lingering smells, though it might take a few weeks.
When it comes to lids, give them a gentle hand wash. It’s better to avoid the dishwasher, as that can lead to rusting over time. Make sure to dry them thoroughly—moisture can cause issues down the line. A handy tip: keep your lids in a small box near the jars. This way, matching lids with jars is quick and easy.
Honestly, placing lids upside down in sunlight isn’t just a quirky idea; it really does help eliminate unwanted smells. Keeping everything fresh and organized not only makes your kitchen look nicer, but it also makes cooking more enjoyable. Additionally, using durable materials for your containers ensures they withstand frequent cleaning and regular use without damage.
Frequently Asked Questions
Can I Use Any Type of Jar for Upcycling?
Yes, we can use various jar types and container materials for upcycling! Each jar serves unique purposes, so let’s choose wisely to make our storage both functional and visually appealing in our workspace.
What Paints Are Safe for Indoor Use With Jars?
When choosing paints for indoor use with jars, we should opt for non-toxic options like Real Milk Paint or Natural Earth Paint, ensuring safe finishes that won’t compromise our health while beautifying our spaces.
How Can I Prevent Rust on Metal Jar Lids?
To prevent rust on metal jar lids, we should focus on metal protection by removing lids after sealing, ensuring they dry completely, and storing them separately. Simple precautions can greatly enhance rust prevention and longevity.
Are Upcycled Jars Suitable for Food Storage?
Yes, upcycled jars can be suitable for food storage if we make certain proper jar hygiene and confirm they meet food safety standards. Let’s remember to clean them thoroughly and avoid any that previously held non-edible substances.
What Are the Best Ways to Transport My Upcycled Jars?
When we transport our upcycled jars, using cushioned clothing as protective wrapping or sturdy totes guarantees safe movement. Clever jar organization keeps them stable, turning our travels into an adventure without breakage fears.


