As an Amazon Associate, we earn from qualifying purchases. Some links on this site are affiliate links at no extra cost to you. Our recommendations are based on thorough research and editorial judgment.
The Specific Use Cases for Fan Brushes in Landscape Painting
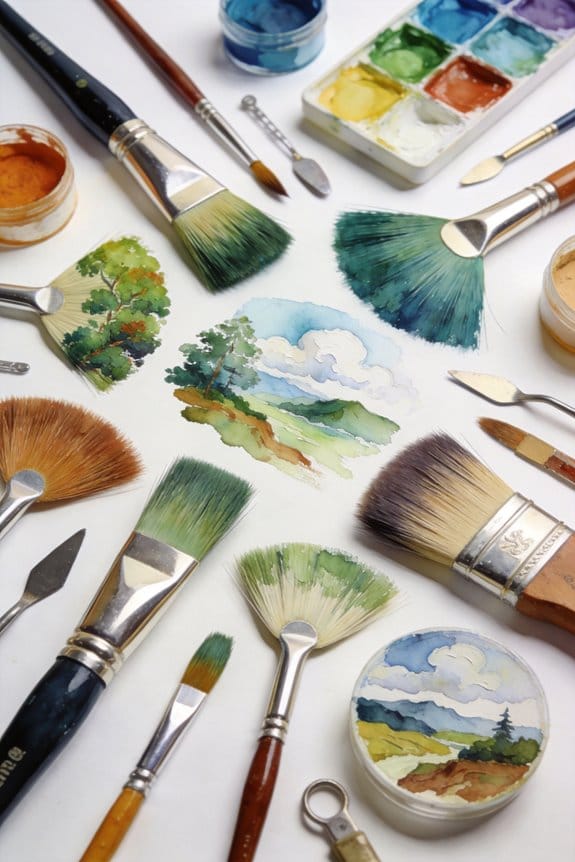
In landscape painting, fan brushes become invaluable tools for various techniques. We can create soft, fluffy clouds by feathering out edge strokes. For trees, using a vertical grip helps simulate natural branches and foliage. When painting grass, quick upward strokes give a realistic look. Finally, fan brushes help us add highlights and textures on surfaces. They come to the rescue in achieving depth and detail. Stick around, and we’ll explore even more creative uses!
Key Takeaways
- Fan brushes are ideal for creating soft, billowy clouds by feathering edges and layering highlights and shadows.
- They effectively mimic the fine textures of tree foliage, allowing for realistic branching and layering of green shades.
- Quick upward strokes with a fan brush simulate lifelike grass patterns and natural textures in bush foliage.
- Fan brushes facilitate textured effects on rocky surfaces through edge stippling techniques for enhanced realism.
- Utilizing a fan brush for water reflections creates layered paint applications that add depth and dimension to landscapes.
How to Use Fan Brushes Effectively in Landscape Painting
You may be interested


Have you ever struggled to get the textures just right when painting nature? Fan brushes can really help you out in capturing those details beautifully.
To create fluffy clouds, start by applying a light color in small blobs. Then, feather out the edges. This technique works wonders for softening the clouds’ appearance—trust me, it makes a huge difference!
When you tackle evergreen trees, try holding your fan brush upright. Use upward strokes to mimic the branches and get those needle-like patterns. It’ll really bring those trees to life.
Grass can be tricky, right? Quick upward strokes with the fan brush are your best bet here—just remember to lift off quickly to keep it looking natural. When it comes to bushes, begin with a solid base color and then tap on other shades with the fan brush. This adds depth, making your foliage look more dynamic.
The best part is you can layer these colors to create a vibrant and realistic scene. With some practice, these techniques can really improve your acrylic painting skills. Using brushes with different sizes can further enhance your control and precision in these methods.
What will you choose to paint next?
Techniques for Blending Clouds With a Fan Brush?

Blending clouds with a fan brush really can elevate your painting skills. Ever struggled to capture that fluffy look in the sky? Start by painting a solid color for the sky or a nice gradient. This gives you a clean base to work with, and trust me, it makes all the difference.
While that paint is still wet, add some dabs of a lighter color with a round or flat brush. This is your cloud base. Now, here’s the trick: grab a small fan brush. Use it to feather out and soften the edges of those blobs. You’ll be surprised how much this helps in getting that soft, billowy appearance we all admire in real clouds.
Think about shadows and highlights. These little details add depth and make your clouds feel more three-dimensional. By varying the angle and pressure of your fan brush, you can create all sorts of textures.
So, why does this matter? Because every little bit counts when it comes to realism in your painting. Try to pay attention to the shape of the clouds you’re creating; the more time you spend on it, the better it’ll look. Using tools like a Viewfinder with Sliding Mechanism can also aid in visualizing compositions and enhancing the accuracy of your landscape scenes.
Next, Explore Painting Realistic Trees With Fan Brushes

Painting realistic trees can really boost your art skills, especially if you love adding a touch of nature to your work. It all starts with the trunk—grab a round brush and lay down a strong base. When you feel good about the trunk, switch it up with a larger fan brush for those branches. Here’s the trick: hold the fan brush vertically. This method really shows off the bristle tips and creates a natural separation that makes your branches look more lifelike.
When it comes to painting evergreens, spacing is key. Apply your strokes evenly; think about how tree needles actually sit on the branches. Layering different shades of green while working your way upwards can add a nice bit of depth. It’s all about giving texture. You might want to play with lighter strokes to suggest delicate leaves, and then go for thicker applications for those robust branches.
Honestly, painting trees is more about practice than perfection. Each brushstroke counts, and the more you experiment, the more you’ll find your style. So, why not give it a try? Remember to enjoy the process, and soon enough, you’ll be creating beautiful, realistic trees that breathe life into your paintings. What’s your favorite tree to paint? Happy creating! For the best results, consider choosing brushes with comfortable handles to reduce fatigue during lengthy painting sessions.
Paint Lifelike Grass and Bushes Quickly
Have you ever looked at a painting and thought, “That grass looks so lifelike!”? It’s those little details, like grass and bushes, that can really make a piece pop.
When it comes to painting realistic grass, fan brushes are your best friend. Try making quick upward strokes, and remember to lift off after each one to keep those edges looking soft and natural. The way the bristles separate creates those beautiful, irregular patterns that grass has in real life.
For the bushes, start with a light base color that feels fluffy. From there, you can layer in deeper tones by tapping in shadows and highlights. This technique not only adds depth, but it also gives your bushes a more three-dimensional look. Varying your brush angles and how hard you press can result in everything from subtle highlights on the grass to the thick foliage of a bush.
Frankly, the key here is to experiment with those techniques. What works for one person may not fit your style, and that’s totally fine. So, why not give it a shot? Your landscapes will start to come alive with just a little practice and some good techniques.
Additionally, selecting the appropriate fan brush size can greatly enhance your ability to create these natural textures effortlessly.
Take these tips and get to painting! What do you think you’ll create next?
Techniques for Using Fan Brushes to Add Highlights and Texture
Ever struggled to make your landscapes pop? Adding highlights and texture might just be the trick you need. A fan brush can be your best friend when it comes to those special touches that bring your artwork to life.
Try this: quick upward strokes with the fan brush will give the illusion of realistic grass. Just let the bristles lift naturally as you paint. When you tackle trees, the technique changes a bit. Hold the brush upright and apply paint directly to the tips; this mimics the fine textures of evergreens perfectly.
So, what about clouds? Gently feather in those lighter tones into your background. This technique creates that soft, fluffy look that captures the essence of a beautiful sky. You can also get creative with rocky surfaces. Using the edge of the fan brush for stippling can really enhance those rough textures, adding character to your work.
The best part is, when it comes to water reflections, layering paint with a fan brush can create subtle highlights that add depth and realism to your scenery. Honestly, it’s these little details that can make all the difference in your art.
For an even more luminous effect on your landscapes, consider incorporating pearl pigment powders to add a delicate pearlescent shimmer that brings your highlights to life.
Caring for Your Fan Brush: Tips for Longevity
Caring for your fan brush can make all the difference in how long it lasts and how well it performs. Have you ever found yourself struggling with a brush that just won’t cooperate? That’s often due to improper care.
To keep your fan brushes in tip-top shape, cleaning them right after each use is crucial. You don’t want paint drying and building up on those delicate bristles. Here’s the trick: use some mild soap and lukewarm water. Gently reshape the bristles after washing to help them maintain their form. This little step ensures your brushes are always ready for action.
Storage is another important factor. Try to store your fan brushes vertically with the bristles facing upward or lay them flat if that works better for you. Avoid bending them at all costs; that can ruin their shape. And please don’t leave your brushes soaking in water for too long—it can break down the glue and cause bristles to shed.
Thinking about transport? Investing in a brush holder is a smart move. It keeps your brushes safe and sound while you’re on the go.
In addition, using proper lighting, such as LED picture lights, can help you see the subtle details in your work, ensuring more precise brush care and application.
So, why does this matter? Taking these simple steps means your fan brushes will be there for you across many art projects to come. It’s all about nurturing your tools so they can perform at their best.
Frequently Asked Questions
What Is the Use of a Fan Brush in Painting?
A fan brush is essential for applying brush texture with techniques like blending with fan brushes. It helps us create soft edges, dynamic foliage, and realistic skies, enhancing our painting’s depth and overall visual appeal.
What Is a Big Fan Brush Used For?
When we wield a big fan brush, magical landscapes emerge! We explore big fan brush techniques to create lush foliage and embrace the benefits of fan brushes, ensuring we always choose the right size for our artistic vision.
What Are Nail Fan Brushes Used For?
Nail fan brushes are essential for nail art, helping us master blending techniques and texture creation. They let us craft intricate designs effortlessly, making them perfect for adding those delicate details we all love.
How to Paint Grass With a Fan Brush?
To paint grass with a fan brush, we’ll use grass texture techniques and various fan brush strokes. By blending colors and varying pressure, we’ll create depth and a lively, realistic grass appearance in our artwork.


