As an Amazon Associate, we earn from qualifying purchases. Some links on this site are affiliate links at no extra cost to you. Our recommendations are based on thorough research and editorial judgment.

How to Mix Realistic Skin Tones Using Limited Palettes
To mix realistic skin tones using limited palettes, we start with essential colors: Titanium White, Yellow Ochre, and Cadmium Red Light for fair skin, and Burnt Sienna, Yellow Ochre, and Transparent Oxide Red for darker tones. We should focus on balancing warm and cool shades to prevent muddiness. Mixing larger amounts of paint helps maintain consistency. Don’t forget to use nudge colors like white to adjust hues and temperatures. Keep practicing, and you’ll discover more tips and techniques to enhance your skills!
Key Takeaways
- Start with a limited palette, such as Titanium White, Yellow Ochre, Crimson, and Black, to create a range of realistic skin tones.
- Mix foundational colors in larger quantities for consistency across your artwork and to avoid muddiness.
- Use nudge colors like white to lighten and adjust the temperature of your mixes for more nuanced skin tones.
- Observe real-life models or photographs to understand the subtleties of skin tone variations and interactions.
- Document your successful mixes to develop a personal reference guide for future artwork, enhancing your mixing skills over time.
Understanding the Basics of Mixing Skin Tones
You may be interested


When it comes to mixing realistic skin tones, have you ever noticed that flesh tones are more than just one flat color? They’re a blend of reds, yellows, and some tricky nudge colors that can really elevate your artwork. Here’s the trick: try focusing on two average colors for both the illuminated and shadowed areas of the skin. By keeping it simple with a limited palette, like the Goya Palette, you can mix just a few key pigments to create a wide range of skin tones.
Understanding color temperature is key, too. Mixing colors that are too different in warmth can lead to muddy skin tones that just don’t look right. So, why does this matter? It’s about achieving those nuanced representations that breathe life into your art. Use nudge colors, like white, to lighten or cool your mixtures; this adds depth and realism that can set your pieces apart.
Truth is, mixing skin tones isn’t as intimidating as it seems. By experimenting with just a couple of colors and being mindful of warmth, you can create beautiful skin tones that resonate with viewers. Remember to keep practicing and experimenting—there’s no one right way to do it! What’s your go-to method for mixing skin tones? Utilizing art projectors can aid artists by projecting reference images to help achieve accurate color nuances in skin tone mixing.
The Importance of a Limited Palette for Realistic Results

Creating realistic skin tones can feel pretty daunting, right? But I’ve found that sticking to a limited palette can really simplify things. When you focus on just a few essential colors, you can actually make a broader range of skin tones without getting lost in a sea of options. For example, if you try using Titanium White, Yellow Ochre, Crimson, and a dash of Black, you’re already on a solid path, inspired by the Zorn Palette approach.
Here’s the trick: experiment with mixing these colors in different ways. You might be surprised at the depth you’ll bring to your work. Want to get a bit darker? Consider adding Burnt Sienna or transparent oxide red to your palette. This will give you those rich shadows that can enhance your skin tones beautifully.
So, why does this matter? A simplified palette helps cut down on muddy mixtures, which means your skin tones can shine clear and vibrant. When you’re not overwhelmed by too many choices, you can have fun experimenting instead.
Incorporating an acrylic flow medium can help you achieve smoother blends and more natural transitions in your skin tone layers by improving paint flow and reducing brush marks acrylic flow medium benefits.
In the end, using a limited palette creates a more effective and enjoyable painting experience. What colors will you choose for your next piece?
Best Colors for Mixing Fair Skin Tones

Mixing fair skin tones can feel a bit tricky at first, but with a few key colors, it doesn’t have to be. You’ll want to stock up on Titanium White, Yellow Ochre, and Cadmium Red Light. Just combining Yellow Ochre and Cadmium Red Light with Titanium White can create a great light flesh tone that works for various undertones.
Ever thought about what happens when you add just a hint of Cerulean Blue? It can cool down those warmer mixes, giving you a more realistic skin variation than you might expect. If you’re aiming to brighten the flesh tone a bit more, Cadmium Yellow Medium does the trick by adding warmth while still keeping it light.
Here’s the trick: play around with the ratios of these colors to explore different fair skin tones. Sometimes, just a slight tweak here and there can make a big difference in the depth and lifelike quality of your artwork. So, why does this matter? Because having those subtle variations is what brings your pieces to life.
In short, stick to Titanium White, Yellow Ochre, Cadmium Red Light, and a splash of Cerulean Blue or Cadmium Yellow Medium. Experimenting with these will help you master the skin tones that resonate with your style. What colors are you excited to mix together next?
Using walnut oil paints when blending these colors can enhance color clarity and provide longer blending times, helping you achieve smoother transitions in skin tones.
Recommended Products

Usable on wood, paper, canvas and metal


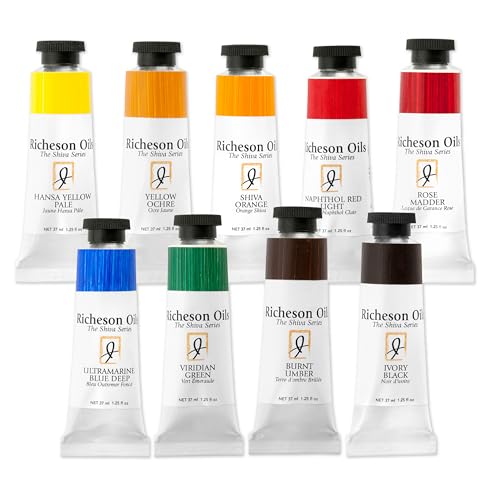
Introducing All the shades of Earth Oil Paint offered by Gamblin in one specific Professional artist set.
Adjusting Your Palette for Darker Skin Tones
To create realistic darker skin tones, figuring out the right colors can feel overwhelming, right? It’s all about finding those key hues that bring warmth and depth to your work. Start by mixing in some burnt sienna or transparent oxide red; these will really help add that richness that’s often missing. Then, add yellow ochre to warm things up even more and give your palette some nice undertones.
For your foundational tone, combine cadmium red with yellow ochre, and if you need to darken it, reach for pigments like burnt umber or brown. Don’t be afraid to play around with different proportions—finding your perfect mix might take a little trial and error, but that’s all part of the fun!
You should also keep in mind the unique undertones present in darker skin. So, why does this matter? Understanding these nuances lets you mix more accurately. Honestly, it’s amazing how much of a difference proper observation can make. With practice, you’ll be able to build a palette that beautifully captures the essence of darker skin tones. To ensure your colors remain vibrant and true over time, prioritize paints with high lightfastness ratings in your selection.
Recommended Products

Wood panel handcrafted in North America from sustainable forested birch

These six professional grade heavy body acrylic paint colors are a great starting point to create endless skin tone options ranging from light to dark.

A luxurious liquid makeup that gives your skin a flawless finish and broad-spectrum protection
Proven Techniques for Mixing Realistic Flesh Tones
When it comes to mixing realistic flesh tones, many people struggle to get it just right. You might be wondering how to create those nuanced skin colors without making them look flat or lifeless. A great starting point is the Zorn Palette, which includes Yellow Ochre, Crimson, Black, and Titanium White. With just these four colors, you can mix a fantastic range of skin tones.
Begin by blending these colors together to establish an average skin tone. It’s really important to consider both the lit and shadowed areas of the skin; this adds depth and dimension to your work. Here’s the trick: don’t shy away from temperature adjustments. A little bit of yellow-green can cool down your mix, while adding more white will brighten things up.
Having a color chart handy can be super helpful for visualizing the different variations of skin tones you want to achieve. Just take a moment to see how those shades differ and play around until you find the right blend.
Honestly, never underestimate the power of temperature and value. Keeping your shades true to life is essential; you want to avoid them looking muddy or chalky.
To recap, starting with a solid color palette and focusing on both light and shadows will set you on the right path. Choosing paints with a creamy consistency can also help in achieving smooth blending and realistic layering. What’s your favorite tip for mixing skin tones?
Recommended Products

ALL-INCLUSIVE OIL SET - The MEEDEN artist oil painting kit, with gift box packaging, is designed for artists, especially art enthusiasts! The set included canvas, paints, brushes, an easel, and drafting supplies. Thanks to the foam protection and the thoughtfully prepared gift package, you may start your artistic adventure from this point, one-stop and safely.

Contents: 1 each of the following Winton Oil Colour 37ml tubes: Titanium White, Cadmium Lemon Hue, Cadmium Yellow Hue, Vermilion Hue, Dioxazine Purple, French Ultramarine, Viridian Hue, Burnt Umber
9 Essential Colors for Fast, Confident Mixing - A thoughtfully curated oil paint set of palette staples designed for maximum mixability—build a full range of hues quickly with a streamlined limited palette approach.
Determine Skin Color Temperature
How can you really nail down the temperature of skin color? It’s a tricky business because color temperature is all about context. There aren’t hard-and-fast rules for what makes a color warm or cool; it’s all relative. One helpful tool is the color wheel. Warm colors like yellow-orange can look great next to cooler shades like blue-green and violet.
When you’re mixing colors, adding white is an option, but it can sometimes cool down the shade too much. If your skin tones start to look muddy or overly chalky, it’s likely a sign that the temperature isn’t right compared to its surroundings. So, why does this matter? Recognizing these temperature differences can significantly impact how colors are perceived, making it crucial for your artwork to shine.
To make realistic skin tones, keep an eye on the interplay between warmer and cooler shades. Here are some tips to help you get it right:
- Use the color wheel as a guide when selecting your palette.
- Test your mixed colors against the skin tone you’re aiming for.
- Adjust as needed; sometimes a small tweak can make a big difference.
Truth is, getting skin color temperature right is vital for creating depth and realism in your work. It’s a dance between the colors and how they interact. So, experiment and trust your instincts—you’ll find the right balance. In the end, it all comes down to understanding those subtleties in temperature. How do you think this knowledge will change your approach to art? Using high-quality dual tip brush pens with flexible brush tips can also help you better blend and layer colors to achieve realistic skin tones.
How to Keep Your Skin Tones Fresh and Natural?
Keeping skin tones fresh and natural can feel like a tricky task, right? But it doesn’t have to be! With a little knowledge and practice, you can achieve beautifully realistic skin tones.
Try starting with a limited palette, like the Zorn Palette. This consists of Yellow Ochre, Titanium White, Crimson, and Black. You can mix these colors to create blends that closely mimic real skin tones.
To keep your colors light and cool, add Titanium White gradually. This simple step can help prevent muddy tones that often happen when colors clash. And who wants dull skin tones when it’s so easy to avoid them?
So, why does this matter? Referencing real-life skin tones or even photographs can show you the subtle differences that make a huge impact. Mixing colors directly on the wheel is a great way to shift between warm and cool tones. As you adjust the temperature carefully, you bring your artwork to life. Also, don’t forget to take a look at surrounding colors because they can affect how you perceive skin tones, too.
In a nutshell, mixing the right colors and paying attention to temperature can make all the difference in achieving fresh and natural skin tones. Additionally, practicing consistently, much like mastering perspective drawing techniques, is essential for improving your color mixing skills. What’s your go-to tip for keeping colors vibrant in your artwork?
The Role of Nudge Colors in Lifelike Skin
Nudge colors are essential for getting lifelike skin tones right in your artwork. If you’ve struggled with making your skin tones look realistic, you’ll want to pay close attention here. Using a nudge color like white can help lighten and cool those tones, which keeps them from looking muddy or chalky. You just have to look closely at your subject to figure out which nudge colors to use for those natural variations.
So, why does this matter? Balancing the color temperatures is crucial for achieving the right look. When you move around the color wheel with nudge colors, you’re able to create skin tones that feel real and inviting. The best part is, training your eye to spot those subtle shifts in hue can significantly improve how accurate your skin tones are in portrait painting.
Try this: Keep a color wheel handy while you’re mixing your paints. You might find it helpful to jot down notes about the colors that work for you and your subjects. Over time, this practice can make a noticeable difference in your work and help you develop a personal style that resonates.
Honestly, every artist goes through this learning curve. Don’t get discouraged if your initial attempts don’t match up to your vision. You’ll get the hang of it—just keep experimenting! Acrylic paints with fast-drying properties are especially helpful when layering these subtle nudge colors to achieve realistic skin tones.
Recommended Products

FACE & SKIN COLORS PALETTET: This set is the ultimate tool for artists looking for realism and diversity in their work. It is composed of 16 shades has been carefully selected to give you everything you need to work with different skin tones. Each shade is formulated to blend easily, allowing you to create smooth transitions and stunning detail. User´s guide inluded

FACE & SKIN COLORS PALETTET: This set is the ultimate tool for artists looking for realism and diversity in their work. It is composed of 16 shades has been carefully selected to give you everything you need to work with different skin tones. Each shade is formulated to blend easily, allowing you to create smooth transitions and stunning detail. User´s guide inluded

Available in 120ml, 500ml, and 1.8-liter sizes, so you always have the right amount for any project
Tips for Practicing and Perfecting Skin Tone Mixing Skills
Ever stared at a blank canvas, feeling overwhelmed by the challenge of mixing skin tones? It can be tough, but trust me, you can definitely tackle it with some practice and smart strategies.
Start simple—stick with just three primary colors and white. This basic palette lets you create a whole range of flesh tones without getting bogged down by too many options. Mix larger amounts of paint to minimize the need to remix later on; this not only saves time but also helps maintain consistency in your work. Use a nudge color like white to fine-tune the temperature and value of your mixes. This really trains your eye to see those subtle differences.
Observing real-life models is crucial. Spend some time just watching how different skin tones interact with light and shadow. It’s all about practice, right? The more you observe, the better your mixes will get.
Documenting your successful mixes is another tip I can’t emphasize enough. Create a personal reference guide with notes on what you used and how you achieved that particular tone. This will be a handy resource for future projects.
Experiment with the proportions as you mix to get even more diversity in your skin tones. And remember, refining your technique is an ongoing journey—don’t be afraid to make mistakes along the way. Honestly, it’s part of the process!
Choosing the right tools, similar to selecting a rotary paper trimmer for precision tasks, can greatly enhance control and consistency in your art.
Recommended Products
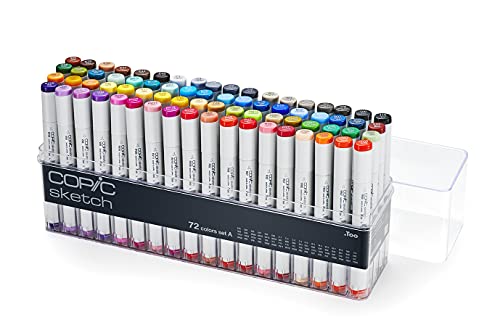
This 72A color set includes a broad range of bright colors, cool and warm grays, as well as 100 & 110 black. All of these colors blend well together. This is a great way to get started with Copic.

Pitt Artist Pens with brush tip can produce a line of 1 to 5mm. They offer odorless, permanent and waterproof inks in vibrant colors that will not bleed through paper. The pigmented India inks are lightfast, acid-free and pH Neutral. The pens are used daily by artists worldwide for illustrations, fashion design, life drawings, portraits, sequential art and canvas paintings. They work beautifully on all types of papers and canvas, permanent on porous surfaces. Also available individually or in as

Frequently Asked Questions
What Colors Do I Mix Together to Make Skin Tone?
To create skin tone, we’ll mix Titanium White, Cadmium Yellow, Cadmium Red, and Ultramarine Blue, adjusting for skin undertones. Our color mixing will vary to achieve a range of realistic hues, capturing diverse complexions beautifully.
How to Make Realistic Skin Color?
To create realistic skin color, we can use skin tone techniques and mixing proportions, starting with a limited palette. We’ll adjust our mixtures to capture the nuances of light and shadow effectively.
Why Do Artists Use a Limited Color Palette?
We flock to limited color palettes because they breed extraordinary color harmony and enhance palette efficiency. By focusing on fewer colors, we discover unparalleled depth, transforming our artistic endeavors into breathtaking journeys of vivid expression.
How Do You Unify Your Color Palette?
To unify our color palette, we focus on color harmony and palette consistency. By selecting a few colors, adjusting temperatures, and mixing thoughtfully, we create a cohesive look that enhances our artwork’s overall impact.


