As an Amazon Associate, we earn from qualifying purchases. Some links on this site are affiliate links at no extra cost to you. Our recommendations are based on thorough research and editorial judgment.

Fixatives: When to Use Workable vs. Final Spray
When we create artwork, knowing when to use workable versus final fixatives is key. Workable fixatives, like Brush and Pencil, let us layer dry media without smudging. Use them after applying colored pencils or pastels. Final fixatives, like Lascaux, seal our completed pieces for long-lasting protection, though they can dull colors. We should spray from at least 12 inches away and use light coats. By exploring these options, we’ll enhance our creative process and protect our pieces effectively.
Key Takeaways
- Use workable fixatives during the creation process to layer dry media without sealing them completely.
- Final fixatives should be applied once the artwork is complete for long-term protection against smudging and fading.
- Workable fixatives allow further applications after spraying, while final fixatives provide a strong protective seal.
- Test both types of fixatives on scrap surfaces to understand their effects on colors and appearance.
- Apply fixatives in light coats from a distance, allowing each layer to dry completely for best results.
Essential Types of Fixatives for Artists
You may be interested

When you’re working on your artwork, choosing the right fixative can be tricky. Do you ever wonder how to keep your layers intact while still being able to add more? That’s where workable and final fixatives come into play.
Workable fixatives are ideal if you like layering dry media, such as colored pencils and pastels. They let you fix one layer while applying more on top, which is super handy. On the flip side, final fixatives give your artwork that protective seal at the end. They help prevent smudging and shield your work from environmental issues. But here’s the catch—sometimes they can dull your colors a bit. So, it’s smart to test them on a scrap piece first to see how they affect your artwork. Different brands can vary a lot in terms of color shift and how well they protect against smudges.
If you’re looking for reliable options, you might want to check out brands like Winsor & Newton or Lascaux. They have a solid reputation your art deserves. Be sure to consider the finish type of fixative you choose, as it impacts both the look and longevity of your artwork.
Recommended Products

Made in United States

Non-Toxic Archival Great for mixed media Works with all media (not oil pastel)

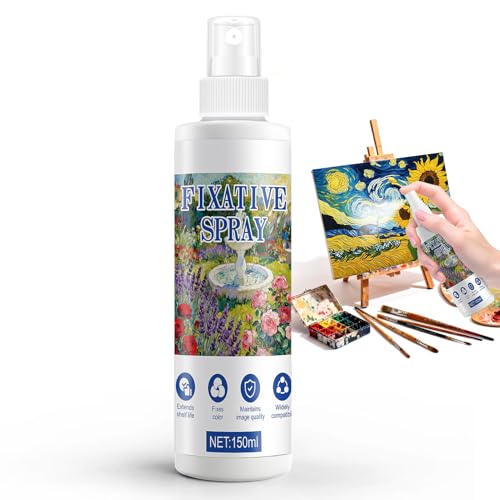
Long-lasting protection. Our fixative spray for art forms a strong, transparent protective film, effectively preventing fading and wear. Whether your artwork is frequently handled, stored, or displayed, this reliable coating locks in every detail, preventing it from gradually losing its original color. Your artwork will always remain vibrant and intact, providing you with trustworthy, long-lasting protection. Combined with our beautifully designed color box packaging, it offers double the reliable, long-lasting protection for your creations, inside and out
What Are Fixatives and Why Are They Important?

Have you ever finished a beautiful drawing only to see it smudge or fade away over time? It’s frustrating, and it can feel like all your hard work is going to waste. That’s where fixatives come into play. They’re key to preserving your artwork and keeping it looking fresh.
There are two main types of fixatives: workable and final. Workable fixatives allow you to keep playing with your media, giving you the flexibility to layer as much as you want after spraying. This is perfect when you’re trying to achieve depth or detail in your artwork. Once you’ve added your last touches, switch to final fixatives. They give your work a permanent seal, ensuring it stays protected over the long haul.
Here’s a quick tip: before you start spraying, give the can a good shake for about 1 to 2 minutes. Always apply the fixative in a well-ventilated area, using light coats to avoid any drips or uneven spots. It’s also a good move to test a few different brands on scrap paper first. You want to find one that fits your needs—Winsor & Newton is a popular choice known for its reliability.
So, why does this matter? Well, if you want your art to last, investing a little time in proper fixative use can make all the difference. Protecting your drawings isn’t just about the materials; it’s about the care you give to your art. Using quality materials and tools like wooden paint palettes can also enhance your overall painting experience and the longevity of your work.
To sum it up, fixatives are your go-to for keeping your creations safe from smudges and wear. Next time you finish a piece, make sure you’re ready to protect it! What are some of your favorite methods for preserving your artwork?
Understanding Workable vs. Final Fixatives: Key Differences

Have you ever finished a piece of artwork only to watch it smudge or smear? It’s frustrating, right? Understanding the difference between workable and final fixatives can really save your sanity when it comes to preserving your creations.
Workable fixatives are lifesavers for those ongoing projects. They lock in dry media without making it impossible to add more later. You can keep layering your work without worrying about losing any detail from previous steps. Think of them as your trusty sidekick while you’re still in the creative zone.
On the flip side, final fixatives are what you turn to when you’re ready to declare a piece truly finished. They provide a strong, lasting seal that protects your artwork from unwanted marks and maintains its integrity over time. If you want your art to stand the test of time, a final fixative is essential.
Both types often come in spray form, which makes application easy. When using fixatives, keep these tips in mind:
- Always maintain a distance of at least 12 inches from your artwork.
- Apply light coats to avoid color distortion.
- Test the spray on a scrap surface before applying it to your main piece.
Additionally, using a stable and durable surface beneath your artwork, such as a self-healing cutting mat, can help ensure clean, precise work and protect your workspace. This is especially useful when working on detailed projects requiring consistent measurements and protection from damage caused by cutting tools on a durable crafting surface.
So, why does this matter? Because you want your art to look its best for as long as possible. Frankly, no one wants to see their hard work fade or smudge away. A little knowledge about these fixatives can go a long way in preserving your artistic journey.
Recommended Products
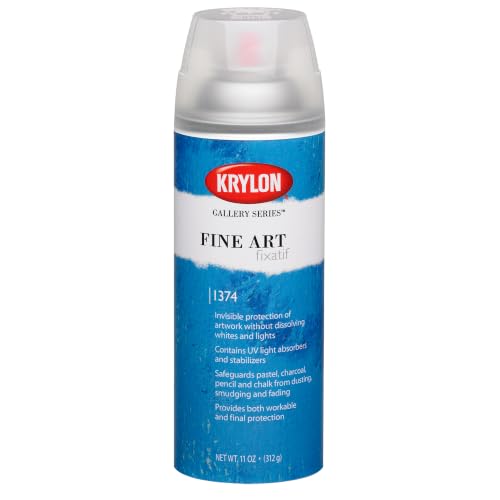
Invisible protection of artwork without dissolving whites and lights

The information below is per-pack only

High quality colourless fixative
Applying Workable Fixatives Correctly
Have you ever felt frustrated when your artwork gets messed up after using a fixative? It happens to many, but there’s a way to do it right. To get the most out of workable fixatives, follow a few simple steps.
First off, make sure your artwork is vertical. Aim for at least 12 inches of distance from the fixative can to your piece. This distance is key to getting an even spray. When it comes to applying the fixative, light coats are the way to go. Think of it as building layers like a cake—too much at once will just collapse everything underneath.
After you spray, patience is essential. Wait for each layer to dry completely before adding more media. This helps maintain the integrity of your earlier work. And here’s a tip you might not think about: test the fixative on a scrap piece of your material first. This way, you get to see if there are any color shifts or if it plays nice with your medium.
Lastly, don’t forget to work in a well-ventilated area. It’s a simple step, but it makes a big difference for your health and your artwork. Choosing a fixative with the appropriate drying time and finish can also improve your final results significantly.
Recommended Products

The spray is acid free and archival safe and protects items from smudging, yellowing and wrinkling

Waterproof Spray: The Krylon Workable Fixatif Clear Spray provides waterproof protection for surfaces.
Long Lasting Protection: This professional OverZyn Workable Fixative Spray for Art forms a strong, transparent protective film on your artwork, effectively preventing blurring, peeling, or fading caused by friction and smearing
Techniques for Using Final Fixatives Effectively
Protecting your artwork with final fixatives is a must, but have you ever thought about how to do it right? First things first, make sure you’re in a well-ventilated area. You want the temperature to be above 65°F, and the humidity? Keep that below 65% too.
Before diving in, give that can a good shake for about 1 to 2 minutes. You want to ensure that the fixative is mixed well. When you’re ready to spray, hold the can at least 12 inches away from your art. Apply in light coats; this isn’t the time to go heavy. Wait about 5 to 7 minutes between coats to let each layer dry. To avoid uneven spots, turn your artwork 90 degrees after each spray.
So, why does this matter? It’s all about protecting your masterpiece while keeping its original beauty intact. And don’t forget to test on a scrap surface first. You don’t want any surprises with color shifts after it’s applied.
For the best results, ensure your fixative is compatible with the oil pastels’ pigment quality to maintain vibrancy and longevity.
In the end, taking these steps can really make a difference in the longevity of your work. Have you thought about how you’re going to protect your art after all that hard work?
Recommended Products
Made from a vinyl resin and alcohol base

PLEASE NOTE: This product is available in multiple sizes and different types of packaging.

Fixative for drawing and paintings created with soft pastels
Avoid These Common Fixative Mistakes
Have you ever felt the disappointment of ruining your artwork with the wrong fixative? It happens more often than you’d think, and avoiding common mistakes can save your pieces from disaster.
First off, always test workable fixatives on a scrap surface before applying them to your artwork. This simple step can reveal potential color shifts you might not want. When it comes to applying the fixative, light coats are key. Try to wait 5 to 7 minutes between each coat. This little pause helps to prevent oversaturation, which can really dull your colors.
Here’s another tip: make sure you’re positioning your artwork vertically during application. This not only guarantees an even spray but also stops the fixative from pooling. Plus, keep a distance of at least 12 inches while spraying to get that fine mist. It helps avoid heavy spots that can mess with your artwork’s finish.
Now, let’s talk about surfaces. It’s crucial to steer clear of using regular fixatives over oily or waxy surfaces. Trust me, you don’t want to deal with staining, especially when working with colored pencils and soft pastels. Also, applying fixatives on carefully prepared surfaces, much like the advice for cleaning surfaces, ensures the best adhesion and finish quality.
How to Test Fixatives Effectively
How to Test Fixatives Effectively
Ever sprayed a fixative on your artwork only to find it changed colors? Yeah, I’ve been there, and it’s a bummer. Testing fixatives is crucial if you want to preserve your work without any surprises. Before you go ahead and spray your masterpiece, always try it on a scrap surface first.
Here’s the trick: start by giving your can a good shake for about 1 to 2 minutes. This helps mix everything up nicely. When you’re ready to spritz, hold the can about 12 inches away from your test surface. This distance is key to getting a good spray pattern.
Apply a light coat and let it sit for 5 to 7 minutes. Keep an eye out for any color shifts—different fixatives can make your media look darker or change its appearance entirely. So, why does this matter? You want to make sure your final look is exactly what you intended.
When testing, try both workable fixative and final fixative on separate test pieces. This will give you a sense of how each one interacts with your layers and sealing process. After spraying, don’t just walk away; monitor the drying process. By doing this, you can really gauge the overall impact on your work.
In short, experimenting with fixatives pays off in the long run. It ensures your artwork stays true to life. Have you ever had a fixative mishap? What did you learn from it?
Also, understanding the finishing characteristics of mediums and sprays can help you predict how fixatives will affect your artwork’s appearance and durability.
Recommendations for Specific Fixatives by Medium
Ever had that moment of horror when you realize your artwork isn’t holding up the way you thought it would? It’s crucial to know which fixatives fit best with different mediums. This can really make a difference in ensuring your piece stays as vibrant as the day you finished it.
For colored pencils, try using a workable fixative like Brush and Pencil or Winsor & Newton Pastel. These options help you restore the tooth of slick paper surfaces, especially after layering those beautiful colors. If you’re working with soft pastels, the Brush and Pencil Texture Fixative does wonders. It minimizes those pesky wax blooms, allowing you to layer more without fear.
So, what about charcoal and graphite? Lascaux fixative is a gentle pick and works great for preserving older pieces. Just keep in mind that framing behind glass is a smart move for that extra layer of protection.
If mixed media is your jam, Daler Perfix is worth checking out, especially with acrylic inks. It offers initial light protection, followed by a nice stable coat. It’s all about keeping your art safe without losing that vibrant look.
Remember, always run a test on some scrap surfaces before applying any fixatives for the final touch. You don’t want to be surprised by any unexpected color shifts.
In the end, taking a little time to figure out the right fixative can really pay off. What’s your go-to method for protecting your artwork?
Additionally, for projects involving multiple surfaces, using versatile acrylic markers like Molotow ONE4ALL can complement fixative use by providing durable, vibrant layers that bond well and resist fading.
Recommended Products

【Preserve Your Artwork’s Original Beauty】: This spray fixative for artwork creates a clear protective layer that helps prevent smudging while preserving the original colors, texture, and fine details of your artwork. Designed for long-lasting protection, it helps reduce fading and yellowing caused by environmental exposure, helping your creations maintain their natural appearance over time.

Professional-Grade Fixing Effect: Designed for various painting media. The kuailaya fixative spray forms an invisible protective film, perfectly preserving the original texture and color of the artwork, facilitating stacking and framing

Oil Pastel Fixative Spray:Charcoal Fixative Spray helps lock pigments in place, reducing smudges, blurring, and accidental rubbing after completion
Enhancing Your Artwork With Fixatives: a Practical Guide
Are you tired of working hard on your artwork only to see it smudge or fade over time? You’re not alone! Finding the right fixative can really help protect your pieces while keeping their vibrancy intact. Workable fixative is a solid choice, especially if you’re layering with colored pencils or pastels. It allows for more detail to be added after you spray, making sure your art feels alive and dynamic. When using it, try applying in light coats. This keeps the paper’s texture intact and prevents your colors from looking too heavy or washed out.
Final fixatives come into play for your completed works. These provide a permanent seal that helps guard against pesky smudges and damage from the environment. Just a heads up, though—they can sometimes darken your colors, so it’s smart to test on a scrap piece first. Here’s the trick: always spray from at least 12 inches away, and be patient—wait about 5 to 7 minutes between each coat to achieve the best results.
Using a smooth, non-porous surface for your artwork presentation can further enhance protection and ease of maintenance.
With these tips, you’re well on your way to enhancing your artwork effectively. What kind of art do you plan to protect with these techniques?
Frequently Asked Questions
What Is the Difference Between Workable Fixative and Final Fixative?
Like a protective cloak, workable fixatives let us keep layering while maintaining our art’s soul, whereas final fixatives seal our masterpieces for posterity. Mastering spray techniques enhances their fixative benefits for ultimate art preservation.
When to Use Workable Fixative?
We use workable fixative during layering techniques to enhance medium compatibility. By applying in light coats and allowing thorough drying, we maintain our artwork’s integrity, ensuring subsequent layers adhere properly without smudging our initial marks.
What Is the 70/30 Rule in Art?
The 70/30 rule in art emphasizes a 70/30 balance, guiding our artistic choices. By focusing 70% on the main subject and 30% on supporting elements, we enhance visual interest and effective application techniques in our compositions.
Can You Spray a Workable Fixative Inside?
“Where there’s smoke, there’s fire,” but when we spray a workable fixative indoors, we should prioritize ventilation. By utilizing proper spray techniques, we secure safety while applying different fixative types in our creative spaces.


