As an Amazon Associate, we earn from qualifying purchases. Some links on this site are affiliate links at no extra cost to you. Our recommendations are based on thorough research and editorial judgment.
How to Stretch Your Own Canvas: A Step-by-Step Guide
To stretch your own canvas, we start by choosing high-quality, pre-primed canvas and durable stretcher bars. We’ll measure and cut the canvas about 3 to 4 inches larger than the bars. Then, we’ll secure the canvas at the center and pull it tight using canvas pliers. It’s essential to check for wrinkles and tension. Finally, we’ll apply multiple layers of primer for a smooth finish. Stick with us, and we’ll guide you through the details.
Key Takeaways
- Choose straight, kiln-dried stretcher bars and high-quality pre-primed canvas for durability and a stable painting surface.
- Measure and cut your canvas 3 to 4 inches beyond the stretcher bar dimensions for proper stretching.
- Start stapling the canvas at the center of each side, ensuring even tension using canvas pliers and alternating sides.
- Inspect for wrinkles and loose areas, adjusting the corners and tightening the canvas as needed for a smooth finish.
- Apply multiple thin layers of primer to enhance paint adhesion, ensuring the surface is free of imperfections before painting.
How to Stretch Your Own Canvas: A Step-by-Step Guide
You may be interested


Stretching your own canvas can really elevate your art experience. If you’re wondering where to start, the first thing to keep in mind is choosing straight, kiln-dried stretcher bars. Thicker bars are ideal for larger canvases since they prevent bending and warping, which can be a real hassle.
Once you’ve got your stretcher bars, cut your canvas about three inches larger than the dimensions of the bars. This extra fabric will make it easier to wrap everything securely.
When you dive into the stretching process, begin by stapling the center of each side of the canvas. Here’s the trick: pull the canvas taut using canvas pliers to ensure you have even tension across the surface. After that, staple down the opposing sides but leave the corners untacked for now. This gives you some wiggle room for adjustments later.
Now, about those corners—once you’re satisfied with the tension, secure them using proper folding techniques. It’s all about making those corners neat and tidy. Before you call it a day, don’t forget to inspect your canvas. Look for any wrinkles or loose areas that might need a bit more attention before you get to priming it. Selecting stretcher bars with mortise and tenon joints can significantly enhance the stability and durability of your canvas frame.
Choosing the Right Materials for Stretching Canvas

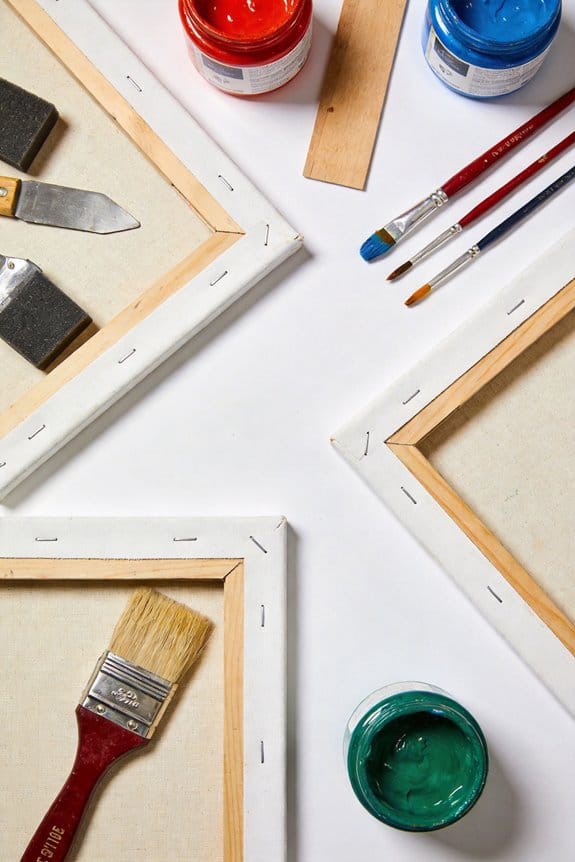
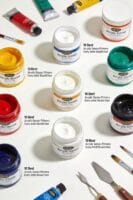
Ready to dive into your canvas-stretching project? Choosing the right materials can really change the game when it comes to how your artwork turns out. You’ll want a high-quality, pre-primed canvas like cotton duck or linen. These materials provide a smooth surface that makes applying colors and mediums a breeze.
For the stretcher bars, opt for straight, kiln-dried wood. Bars that are 3/4 or 1 5/8 inches thick work best, especially if you’re tackling larger canvases. If your canvas is 36 x 48 inches or bigger, don’t skip the crossbars—they’ll keep everything nice and stable. And remember, you’ll need at least 3 inches of extra canvas to wrap around the bars; this is crucial for getting a tight and professional finish.
Don’t forget to gather a few essential tools before you start. Heavy-duty staples, scissors, and the necessary hardware are must-haves to ensure the process goes smoothly. Additionally, selecting a triple primed canvas can enhance paint adhesion and durability for your finished piece. So, what are you waiting for? Get those supplies and let your creativity flow!
Recommended Products


· Extra Fine Grain Linen Canvas – Quadruple Primed & Ready to Paint Professional-grade linen canvas for oil painting, acrylic, and gouache. Features a smooth portrait surface with 4 layers of gesso for rich color payoff, superior paint grip, and gallery-level detail. Ideal for fine art and commissions.

· Canvas Stretcher Bars for Artists – High-quality kiln-dried pine canvas stretcher bars, precision cut for a perfect fit and guaranteed not to warp. The #1 choice for professional canvas stretcher frames, studios, galleries, schools, and DIY projects.
Essential Tools for Stretching Canvas

Are you ready to tackle your canvas stretching project? Getting the materials is just the first step; it’s the tools that’ll make or break your success. A heavy-duty staple gun is your best friend here—it holds the canvas tight to the frame. Canvas pliers are a must to make sure you get that perfect tension every time. And when it comes to assembling the stretcher bars, a rubber mallet is a lifesaver.
You’re definitely going to want to keep a measuring tape handy for those precise dimensions and alignment. Strong scissors are essential for trimming away any excess canvas, giving your work a clean finish. If you ever need to adjust the staples, a staple lifter will come in handy.
Honestly, it’s also wise to monitor your workspace conditions. A thermometer and hygrometer can help ensure that you’re stretching your canvas in the best environment possible. Using ergonomic tools can also improve your comfort and efficiency during the stretching process.
Recommended Products
The crown stapler is 100% battery powered. Eliminates the hassle of using gas, compressor, and hose

Construction Applications: Pneumatic fencing stapler designed for heavy duty mesh and woven applications such as electrified single wire with insulation, horse and deer fencing, and chain link fencing
COMPLETE 4-PIECE NAILER COMBO KIT: Includes a 21° framing nailer, 34° angle finish nailer, brad nailer, and narrow crown stapler—covering everything from heavy-duty framing to fine finish projects.
Measuring and Cutting Your Canvas to Size
Before you dive into stretching your canvas, one of the big tasks is getting those measurements and cuts just right. Start by laying the stretcher bar frame face down on the canvas. This simple step helps ensure your measurements are spot on and lets you check those overlapping edges.
Now, here’s the trick: measure and mark about 3 to 4 inches beyond the dimensions of the stretcher bars. This extra bit is what you’ll use to wrap the canvas around the bars, and trust me, it makes a difference in the final look. Once you’ve got that marked, grab some sharp scissors and cut along those lines for a nice straight edge.
But don’t rush it. Take a moment to assess the weave orientation of the canvas too. Why does this matter? Well, you want it to match your painting’s layout, so you get the look you’re aiming for. And don’t forget to inspect the fabric for any imperfections because those can really mess with the stretching process later on.
Also, choosing the right canvas weight and material quality can significantly affect your painting’s durability and finish, so be sure to select a pure linen canvas that suits your project.
In short, measuring and cutting your canvas properly sets the stage for a successful project. So, are you ready to turn that canvas into something special?
Recommended Products

Durable Medium Weight: This 11 oz. primed linen canvas provides a sturdy and medium texture, ideal for professional oil painters seeking a reliable long canvas for painting large artworks
![Claessens Universal Primed Linen Rolls - Professional Quality Handcrafted Universal Primed Linen Canvas Rolls for All Wet Media - [#13 Very Fine Texture - 82 in x 6 Yard]](https://m.media-amazon.com/images/I/41Mv2D+NLBL._SL500_.jpg)
Hand-Primed Linen Canvas: Experience the superior bonding surface of our linen canvas, hand-primed for oil and alkyd painting; Each layer is meticulously sanded and dried for 10 days in a warm-air oven, ensuring professional quality and durability

Hand-Primed Linen Canvas: Experience the superior bonding surface of our linen canvas, hand-primed for oil and alkyd painting; Each layer is meticulously sanded and dried for 10 days in a warm-air oven, ensuring professional quality and durability
Getting Your Stretcher Bars Ready for Stretching
Getting Your Stretcher Bars Ready for Stretching
Ever had trouble stretching your canvas? It can be a bit of a process, but once you get your stretcher bars ready, you’ll feel so much more prepared. Start by selecting straight, kiln-dried stretcher bars. You’ll want to pick sizes like 3/4 or 1 5/8 inches, depending on how heavy your canvas is.
When you’re ready to assemble, grab a rubber mallet—it makes a world of difference. This helps ensure those mitred mortise and tenon joints fit tightly, which leads to a stable frame. Now, double-check the diagonals of your assembled frame. You’re aiming for a perfect rectangle here. Remember, if you’re working with larger canvases, adding crossbars is a smart move for extra support.
Before laying out your canvas, make sure everything’s lined up correctly. This alignment matters for even stretching later. Don’t underestimate this step; it’s the little things that contribute to a successful canvas stretch. Using durable and quality materials for your stretcher bars can significantly improve the longevity and stability of your canvas frame.
Recommended Products

Features: Back stapled to Allow for keying or re-stretching (keys Included), long linen fibers for long lifespan, non-mechanical surface with a lovely fine texture, larger sizes are braced to provide rigid support, and easy to re-stretch or tighten the canvas
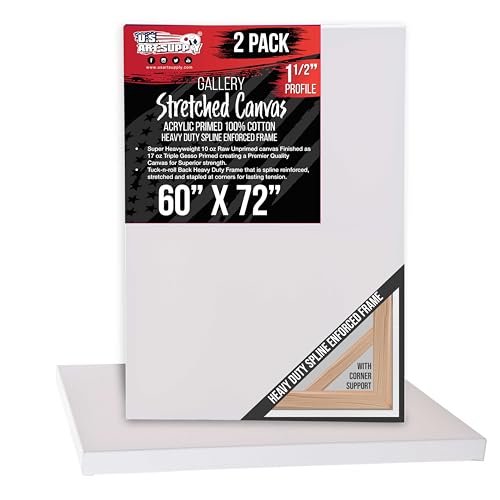
Professional Artist Quality: 1-1/2 inch gallery depth profile canvas with reinforced back spline & deep slanted stretcher bars. 17-ounce heavy-weight triple primed surface is ideal for use with acrylic, oil, watercolor, gouache, tempura, pouring paint, airbrush paint, epoxy resin and other painting media.

🏆 COMPLETE 5-IN-1 SWEDISH WALL GYM SET: Everything Your Family Needs in One Bundle: Get a full Swedish ladder gym with wooden ladder bars, gymnastic rings, climbing rope, rope ladder, and wooden swing - all included, no extras to buy. This Swedish climbing wall transforms any room into a real indoor playground. From active kids to adult workouts, this all-in-one Swedish stall bars set delivers gymnastics training, free play, and exercise in one space-saving frame.
Step-by-Step Techniques for Stretching Canvas
Stretching canvas can feel a bit daunting, right? But once you break it down, it’s really not that bad. Start by measuring and cutting your canvas, making sure to add an extra 3 to 4 inches beyond the size of your stretcher frame. This added material is essential for wrapping around the edges.
Next, when you begin the stretching process, try tacking down the center of each side with a staple. It helps to secure the canvas in place. After that, grab some canvas pliers; they’re a huge help in pulling the fabric taut. Don’t rush—take your time as you alternate stapling the opposite sides, placing staples about 2 to 3 inches apart. Oh, and leave the corners unstapled for now.
Once you’re at this stage, it’s vital to check for any wrinkles. So, why does this matter? Wrinkles can really throw off the final look of your artwork. If you spot any, a simple fix is to apply a bit of hot water to the back of the canvas. It’ll make the fabric much easier to manage as you continue with stretching.
Wrapping it all up, stretching canvas can actually be a pretty straightforward process once you get the hang of it. Using the right tools and materials can also ensure a smooth and durable finish. Give it a try, and who knows? You might even enjoy the process! How do you usually handle stretching your canvas?
Perfecting the Corners: Tips for a Neat Finish
Is there anything more frustrating than tackling those corners on a stretched canvas? Clean corners can make or break the whole look of your artwork. To get that polished finish, start by folding your corners into a triangular shape, just like a mitred joint. This little trick keeps things smooth and helps avoid that pesky puckering that can ruin your hard work.
Before diving into the corners, make sure every staple along the side bars is secure. A tight canvas is crucial for a neat overall appearance. When it comes time to fold the corners, I recommend making sure your final fold runs parallel to the top bar and doesn’t overlap where the stretcher frame meets. Keeping it tidy here is key.
Now, if you’re wondering how to keep those folds from popping back up, a few staples will really help. Tack them down securely to give your canvas that professional vibe. After you’ve got all the corners tacked, take a moment to check for any irregularities. This step is important to keep the tension across the canvas nice and even.
In the end, taking a bit of extra care with those corners really pays off. It’s all in the details! When stretching a canvas, also remember the importance of using ergonomic handles on your tools to maintain comfort during the process. What are some of your go-to tips for achieving a clean finish?
How to Identify and Fix Canvas Tension Issues?
Identifying canvas tension issues can be a real pain for artists, can’t it? If you’re noticing visible wave patterns or spots where your canvas is sagging, those are signs of uneven stretching. Take a moment to gently tug at different sections of your canvas. If something feels loose, that’s your cue to make some adjustments.
Next, flip your canvas over and check the back. Are there any obvious slack or folds? Those could mean the canvas isn’t fastened properly to the stretcher bars. If you’re facing warping or uneven tension, it might be time to loosen some staples and re-stretch your canvas. Don’t forget to leave a bit of extra fabric; this little tip gives you room for future adjustments, making re-tightening a breeze down the line.
Honestly, regular checks on your canvas can really keep your artwork looking its best. Think about it: what’s the point of all that effort if your masterpiece isn’t displayed the way you envisioned? So, keep an eye on those tension levels and enjoy the process of creating! Using art drying racks can also help maintain your canvas’s shape and tension while it dries, preventing warping and damage.
Recommended Products
· Canvas Stretcher Bars for Artists – High-quality kiln-dried pine canvas stretcher bars, precision cut for a perfect fit and guaranteed not to warp. The #1 choice for professional canvas stretcher frames, studios, galleries, schools, and DIY projects.

【𝗦𝗨𝗣𝗘𝗥 𝗛𝗘𝗔𝗩𝗬 𝗗𝗨𝗧𝗬 𝗡𝗘𝗪 𝗣𝗔𝗧𝗘𝗡𝗧 𝗗𝗘𝗦𝗜𝗚𝗡】: Made of 260 GSM permeable extra heavy duty fabric, heavy duty stainless mounting rings, cable wires built-in edges, integrate into the mounting rings, all pulling strength goes to the cable wires, not only making the edges more durable, it also enhence the appearance of shade sail.

[Built To Last] Hand-crafted by a Top-Rated canvas brand on Amazon with vibrant long-lasting colors and exceptional details that will brighten up and transform your space.
Priming Your Stretched Canvas for Painting
So, you’ve got your canvas nice and secure on the stretcher, but what’s next? The important step here is priming your canvas. You can actually start painting on a primed canvas right away, but if you want to boost the quality, layering on additional primer can really make a difference. When you go for multiple thin layers, it helps your paint stick better and keeps everything looking fresh for longer.
Now, let’s talk about your primer options. You’ve got three main types to consider: oil-based grounds, acrylic primers, and absorbent grounds. Each one has its own vibe depending on what medium you’re using. While you’re at it, keep an eye out for any bumps or imperfections on the surface. A smooth canvas makes it way easier to paint, and who doesn’t want that?
If your canvas isn’t pre-primed, it’s a good idea to seal it first with size and ground layers. This little step can prevent headaches down the line with paint not adhering properly, which could really throw a wrench in your project. Remember, taking the time to prepare your canvas right can make a world of difference in your artwork. Using multiple coats of gesso can effectively seal the surface and improve paint adhesion, especially when working with oil paints.
Final Steps for a Professional Finish
Have you ever finished stretching a canvas only to notice it still isn’t quite right? It can be frustrating when all that hard work doesn’t seem to end with a polished look. But don’t worry, getting that professional finish isn’t as tricky as it might seem! Here are some final steps to ensure everything looks perfect.
Start by grabbing a tack hammer. Gently tap in any staples that are sticking up; this will help create a smoother and flatter surface. It’s one of those little details that can make a big difference!
Next, take a good look at your canvas. Are there any wrinkles or slack areas? If you find any, here’s the trick: using hot water can help shrink and tighten the fabric for a flawless finish. Just be careful not to soak it—you’re aiming for just enough to smooth it out.
When it comes to folding the corners, think clean and crisp. Aim for those clean triangular folds that lay flat without any lumps. They should align nicely with the top stretcher bar. If you see the canvas starting to sag, inserting some additional wooden wedges in the corners will help maintain the tension. This can really keep everything looking tight and professional!
And now, for the final touch: priming. Remember, the best part is applying multiple thin layers for that gorgeous finish. This step can truly elevate your artwork. To keep all your art tools organized during this process, consider using a rolling utility cart to streamline your workflow and save space.
Frequently Asked Questions
Should You Stretch Canvas Wet or Dry?
We believe dry canvas offers superior advantages, maintaining tension and longevity, while wet stretching provides temporary benefits for adjustment. Understanding these techniques’ trade-offs helps us make informed choices for ideal canvas preparation and paint absorption.
Can You Make Your Own Stretched Canvas?
Yes, we can definitely make our own stretched canvas! With DIY canvas stretching, the right tools, quality canvas materials, and solid frame construction, we’ll enjoy benefits like cost savings and customization for our painting techniques.
Do Professional Artists Stretch Their Own Canvas?
Yes, we professional artists often stretch our own canvas for better quality and creative control. While it may require time and investment in art supplies, the customized results enhance our finished product and studio setup.
Is It Cheaper to Stretch Your Own Canvas?
Yes, it’s cheaper to stretch our own canvas. By considering cost comparison of DIY canvas versus professional services, we save on material expenses while customizing canvas quality and using budget-friendly options, despite time investment required for stretching techniques.


