As an Amazon Associate, we earn from qualifying purchases. Some links on this site are affiliate links at no extra cost to you. Our recommendations are based on thorough research and editorial judgment.
Why Do Acrylic Paints Shift in Color When They Dry?
Acrylic paints shift in color when they dry due to the binder’s transformation from milky white to clear. Dark pigments often darken more noticeably, while lighter colors shift less but still change. This means that a color may look different on your palette compared to the final dried result. To manage this issue, we recommend testing small samples of mixed paints. By doing so, we can get a better idea of what to expect in color changes.
Key Takeaways
- Acrylic paint’s binder transitions from milky white when wet to clear when dry, affecting color perception.
- Darker pigments may darken significantly upon drying, while lighter colors can still show variations.
- Paint thickness influences color shifts; thicker layers often appear darker due to more shrinkage during drying.
- Environmental factors, such as temperature and humidity, impact drying speed and thus color change in acrylics.
- The quality of acrylic brand affects color stability; professional-grade paints typically exhibit less drastic shifts than student-grade options.
What Causes Color Shift in Acrylic Paints?
You may be interested

Have you ever finished a painting only to find that the colors look totally different once they dry? You’re not alone! This common issue is caused by the binder in acrylic paint going from a milky white when wet to clear as it dries. As this shift happens, the pigments can darken, altering the final appearance of your artwork.
Darker pigments usually undergo a more noticeable change. Lighter colors? They might not shift as much, but that can still throw you off. And if you’re working with transparent pigments, you’re likely to see highlights fade a bit as the paint dries.
So, how can you deal with this color shift? Here’s the trick: mix your colors a step lighter than what you think you want. This simple adjustment can help you get closer to the final shade you aim for. Try testing small amounts on a scrap surface before going all-in on your masterpiece. Honestly, it’s worth the little bit of extra time to save you from surprises later on.
Using an acrylic flow medium can also help maintain color brightness and smoothness as the paint dries.
How to Test Colors for Accuracy Before Application

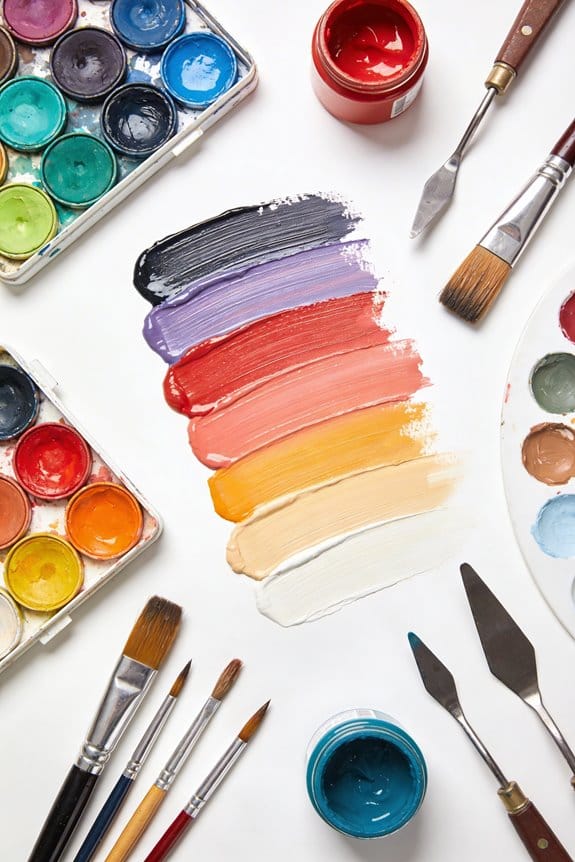
Testing colors before you jump into your artwork can save you from some frustrating surprises later on. When you’re working with acrylic paints, it’s super helpful to mix up a small sample and let it dry. Why is this so important? The color when dry might look a lot different than it does when it’s wet, and you want to be sure what you’re actually dealing with.
Also, consistency is key here. Stick with the same medium and mixing technique during your tests. Lighter colors usually stay true to their original shade, while darker colors sometimes darken quite a bit. A tip that really helps is to use whites, like Titanium White, which can give you a better idea of brightness and opacity.
After you’ve done your tests, make sure to jot down your results in a color reference guide. This step is often overlooked but can really help in managing your expectations. Knowing how those colors will act in your final piece can be a huge relief. So, why does this matter? Well, it leads to a lot more confidence in your choices!
In short, be prepared and do a little homework first. Also, considering drying time considerations can help you plan your painting session better to ensure your colors dry as expected. How do you feel about color mixing in your own projects?
Recommended Products

Value set: 2 pack acrylic transparent palettes include 1 pack 11.8 x 7.9 inch rectangular transparent palette, 1 pack 11.8 x 7.9 inch oval palette.

The Package Contains 4 Round Paint Tray Palettes Plastic.
How to Anticipate and Adjust for Color Changes?

How can you effectively anticipate and adjust for color changes when using acrylic paints? It can be frustrating when your colors don’t turn out as you expected. So, here’s a tip: mix your paints a shade lighter than what you think you want the final result to be. This small tweak helps offset the darkening that typically happens as the binder dries clear.
Don’t skip testing your mixes first! Try this: grab a sample and let it dry to see how it truly looks. This step is key to understanding how the color will change. Another trick is to incorporate Titanium White into your mixtures. It not only lightens the color but also increases opacity, giving you more control in your adjustments.
Now, here’s where it gets a bit tricky: darker colors usually shift more than lighter tones. So, if you’re working with deeper shades, take some extra time to be mindful of how they’ll dry. After a bit of practice, you’ll likely get better at predicting those tricky color changes.
It’s about trial and error, but with these practical tips, you can become more confident as you work with acrylics. Have you ever experienced unexpected color shifts in your art? It’s all part of the learning process!
Regular cleaning of your airbrush with an airbrush cleaning kit can also help maintain consistent paint flow, reducing unexpected color changes due to clogging or residue buildup.
Recommended Products

Spacious 20-well design for creative freedom: This set of two large 10x13 inch paint palettes offers ample space with 20 individual wells, perfect for holding a wide variety of colors, separating pigments, or creating custom mixes for your artwork.
★【Premium Paint Palette】 - It’s made of plastic high quality, sturdy, durable. Our palettes have the advantages of firm and durable structure, break-proof, smooth surface, easy cleaning .

Paint brush cleaner features a lid, a paint palette and a brush wash basin for water and mixing
How Acrylic Binders Influence Color
Ever started painting with acrylics and thought, “Wow, this color looks different than I expected”? You’re not alone! Understanding how acrylic binders affect color can make a big difference in your art. When acrylic paint is wet, it usually appears milky or white. This can throw you off a bit during application since you might not see the true color. But don’t worry, it’s just part of the drying process. As the paint dries, the water evaporates and the binder becomes transparent, revealing the actual color underneath.
Now, here’s a little secret: darker pigments tend to darken even more as they dry. If you’re using professional-grade acrylics, you’re less likely to experience drastic changes in color compared to student-grade options, which can be a bit unpredictable. So, what’s the best way to deal with this? Mixing your colors a shade lighter than you initially want can really save you from those unpleasant surprises later.
You might wonder, “Why does this matter?” Well, knowing how different binders behave can help you get results that look more like what you envisioned when you first started painting. It’s all about achieving that final piece that reflects your original intent with those vibrant acrylic colors. Additionally, selecting the right acrylic paint mediums can influence the drying process and final color appearance, helping you achieve the perfect finish.
How Thickness Affects Shrinkage and Color
Have you ever noticed your acrylic paint looks different when it dries, especially after applying a thick layer? This is something many artists experience, and understanding how thickness affects shrinkage and color can save you some headaches later on.
When you put down thicker layers of acrylics, you might find that they shrink more as they dry. This happens because the water in the paint evaporates, causing the polymers to come together and fuse. As a result, those thick areas can end up darker when they dry. It’s because the binder, which appears milky when wet, becomes clear once it dries.
To avoid this, try this: use multiple thin layers instead of slapping on one thick coat. This not only gives you better control over the drying time but also helps reduce the chances of a drastic color shift, especially if you’re working with darker pigments.
So, why does this matter? Well, a lot of us just want that perfect finish, right? And managing the thickness can make all the difference in your final piece.
The best part is, with thin layers, you can build up your color gradually, creating beautiful depth without the frustrating unpredictability that comes with thicker applications. Just keep an eye on how thick you’re going with your layers. It really does impact your results! Do you think you’ll try out this method next time you paint?
Using an acrylic gel medium can also help control the paint’s consistency and finish, reducing unwanted shifts in color and texture.
Best Practices for Mixing to Minimize Color Shift
Mixing acrylic paints can be a bit tricky, especially if you want to avoid that pesky color shift when things dry. Ever painted something one color only to realize it looks completely different once it’s dry? Yeah, I’ve been there too. To help you dodge that mistake, here are some strategies that can work wonders.
First off, try mixing your colors a bit lighter than you think you want. This little trick compensates for any darkening that could happen as the paint dries. When you’re adding highlights, consider applying thicker layers. Thicker paint tends to stay vibrant, while those thinner layers? They might darken more than you’d like. It’s also best to avoid using water to thin your acrylics. This can lead to unpredictability—and trust me, that’s not something you want in your artwork.
Adding opaque colors like Titanium White can really brighten things up and reduce that color shift too. Here’s a tip: Before diving into your bigger project, always test small samples of your mixed colors first. Once they dry, you’ll get a clearer idea of how they’ll actually look on your canvas. Using paints with high pigmentation can also help maintain color vibrancy and minimize fading after drying.
Recommended Products

VIBRANT ACRYLIC PAINTS : Shuttle Art 30 Acrylic Paint Set consists of 30 vibrant assorted colors and with BONUS 3 FREE PAINT BRUSHES. Each tube is filled with 12 ml (0.4 oz) paints with rich pigments that are professional artist quality

VIBRANT ACRYLIC PAINTS : Shuttle Art 16 Acrylic Paint Set consists of 16 vibrant assorted colors and with BONUS 3 FREE PAINT BRUSHES. Each tube is filled with 12 ml (0.4 oz) paints with rich pigments that are professional artist quality

BRUSH + FINE DUAL TIP: Switch easily between detailed lines and expressive strokes with a 1 mm fine tip and a flexible 1–5 mm brush tip. These water-based acrylic paint markers are ideal for lettering, sketching, coloring, illustrations, and DIY art projects.
How Temperature and Humidity Affect Acrylic Drying?
Have you ever noticed how your acrylic paint seems to dry at different speeds depending on the weather? It can be super frustrating when you’re engrossed in a creative flow and suddenly, the paint won’t cooperate. Well, temperature and humidity play a huge role in the drying process.
Warm weather is great for painting because it speeds up drying times. On the flip side, high humidity can really slow things down. When there’s a lot of moisture in the air, it prevents the paint from evaporating properly, which means it’s going to take longer for your masterpiece to dry. Honestly, it can be a drag to deal with. But just when you think you’ve found the perfect balance, those dry winter months can cause another headache. In those heated indoor spaces, the paint can dry too quickly, leading to problems like uneven layers.
So, what’s the best temperature for your painting sessions? Aim for between 60°F and 80°F (15°C to 27°C). You’ll find that paints behave much better in this range. Also, keep an eye out for that tacky feel—high humidity can leave your paint feeling sticky, even if it looks dry to the eye.
The takeaway? Monitor your painting environment closely. You’ll have a much smoother experience if you’re aware of how the weather’s influencing your materials. What do you think would happen if you tried painting at a different time of year? It could just change your whole approach!
Additionally, selecting acrylic paints with the right consistency and texture can help manage drying behaviors effectively.
What Common Mistakes Should I Avoid?
Creating stunning acrylic paintings can be a thrilling journey, but it’s easy to stumble into some common traps. One big mistake to avoid is mixing colors that are too dark. Dark pigments can shift significantly when they dry, making your highlights disappear. Think about it: you want those bright spots to pop, not fade away into darkness.
Another issue? Thinning heavy body paint with too much water. This can lead to unexpected changes in texture and opacity. You want to keep your paint rich and vibrant! So, what can you do instead? Pre-mixing your colors allows you to see how they’ll look when dry. If you choose lighter mixes, you’ll compensate for any darkening that might happen.
Also, stay away from using transparent colors for your main highlights. They just won’t give you the brightness you’re looking for. It’s all about clarity, right? Additionally, keep in mind that thicker applications of paint can shrink and shift as they dry. This might mess with the clarity of your work. Using paints with a creamy consistency can help maintain color stability and ease blending during application.
Recommended Products

NEW AND IMPROVED FORMULA – Experience enhanced color vibrancy and opacity, smoother application, and a satin finish, now with vegan-friendly ingredients.

50 VIBRANT COLORS : Shuttle Art Acrylic Paint Set comes with 50 colors acrylic paint in 60 ml/2 oz bottles, providing the most commonly used colors and inspiring hot fluorescent and metallic colors to your art projects, ideal for painting and crafting

WHY BASICS. - Liquitex invented artists' acrylics back in 1955 and we've specialized in acrylics ever since. Basics gives you the perfect balance of quality and economy. Made for all artists, Basics acrylics are student-quality.
Choosing the Right Acrylic Brand for Quality Control
When you’re diving into acrylic painting, the brand you choose can really shape the outcome of your artwork. Ever notice how some acrylics seem to bring your colors to life while others just fall flat? Professional-grade options like Winsor & Newton are a solid pick because they have higher pigment loads. This means less color shift and more vibrant hues after drying, which is something every artist hopes for, right?
Now, if you’re looking for something budget-friendly, Galeria Acrylic might catch your eye. But heads up, these tend to dry faster and often exhibit more noticeable color changes. If you’re aiming for consistent results, that can be a bit tricky. On the flip side, brands like Golden Fluid Acrylics stand out for their reliable color matching—perfect for those precision details in your work.
Opacity is another key consideration. Using opaque whites, like Titanium White, can help keep your colors bright and minimize any unwanted shifts. So, why does this matter? Well, achieving the look you want isn’t just about expression; it’s also about control over the final piece.
Truth is, the paint you choose can either elevate your artwork or lead to disappointment. So, take your time to experiment and find the right fit for your style. What acrylic brand have you tried that left you pleasantly surprised?
Additionally, considering the lightfastness ratings of your acrylic paints can ensure your work remains vibrant and fade-resistant over time.
Recommended Products

60 COLORS WITH 5 METALLICS: Build a full acrylic palette with 55 classic colors and 5 metallic shades in one organized set. The wide color range gives you ready options for canvas painting, mixed media, color studies, decorative projects, and bold accent work without relying on constant mixing.

INFINITE RANGE OF COLORS: A wonderful array of 100 different vibrant acrylic paint colors can meet your various painting needs. Including 76 regular acrylic paints, 16 metallics, and 8 fluorescents. Basics & novelties, colds & warms, what you need & what you want, all in one.

ALL INCLUSIVE PAINT SET: Unleash your creativity from beginner to professional level with this fun and educational acrylic paint. Open the box, and you're ready to draw and paint! It comes complete with 24 vibrant paints in 60ml bottles, providing ample colors for your artistic endeavors. Additionally, we've included 12 high-quality acrylic paint brushes, catering to both kids and adults.
Frequently Asked Questions
Does Acrylic Paint Change Color as It Dries?
Yes, acrylic paint does change color as it dries, creating noticeable color variation. We often find it helpful to test our mixes beforehand, ensuring we achieve the desired hue once the paint is fully dry.
What Does Adding Dish Soap to Acrylic Paint Do?
Adding dish soap to our acrylic paint enhances flow and blending, thanks to its surfactants affecting paint chemistry. It’s essential we use it sparingly, as too much can alter consistency and impact our final results.
Why Is My Paint Drying Two Different Colors?
We’ve all experienced frustration when our paint dries two different colors. It could be due to color consistency, where varying pigment qualities, humidity, or surface issues affect the final appearance. Always test your colors beforehand!
Why Is My Paint Changing Color?
Our paint’s changing color happens due to color shift as it dries. The binder’s transparency affects the final hue, so we should test colors beforehand and mix slightly lighter to achieve our desired shades.


