As an Amazon Associate, we earn from qualifying purchases. Some links on this site are affiliate links at no extra cost to you. Our recommendations are based on thorough research and editorial judgment.

Understanding Flow Improver for Airbrushing and Fluid Art
Flow improver is a helpful additive for acrylic paints, making them flow better and reducing bubbles. It acts like a surfactant, lowering surface tension. For best results, mix 1 part flow improver with 5 parts paint, but don’t exceed 30% to avoid issues like cracking. This additive can improve airbrushing and fluid techniques, making application smoother. Proper use can transform your artwork. Stick around, and you’ll discover practical tips for using flow improver effectively.
Key Takeaways
- Flow improver enhances acrylic paint flow, reducing surface tension and preventing bubbles, scratches, and clogging during airbrushing and fluid art applications.
- The ideal mixing ratio for flow improver is 1 part to 5 parts paint, with excess leading to issues like cracking or flaking.
- It increases fluidity, improves blending opportunities, and aids in creating distinct cell patterns while mimicking translucent watercolor effects in fluid art.
- Always test mixtures on a palette before full application, ensuring compatibility with paint and avoiding overuse beyond 30%.
- Proper storage in a cool, dark place and regular cleaning of airbrush tools ensures optimal performance and longevity of both flow improver and artwork.
What Is Flow Improver and How Does It Work?
You may be interested


Have you ever struggled with your acrylic paint not flowing quite right through your airbrush? If so, flow improver might be exactly what you need. This additive can really help your paints spread evenly and smoothly, which is essential for achieving that perfect finish. When you use something like Vallejo Flow Improver, which works as a surfactant, it decreases the surface tension of your paint mixtures. Why is that important? It helps stop those annoying bubbles and scratches that can ruin your artwork.
So, what’s the best way to mix it? Aim for a ratio of 1 part flow improver to 5 parts paint (that’s 1:5 if you’re keeping track). This balance gives you great performance without sacrificing the integrity of the paint. But here’s the catch: if you go over 30% flow improver, you could end up with cracking or flaking issues. That’s something you definitely want to avoid!
Honestly, grasping these basics can do wonders for your airbrushing technique. You’ll notice improvements in your artwork, and that’s always encouraging. Remember, the goal is to create beautiful work, so keep experimenting with what works best for you. What techniques have you found helpful in your painting journey? Additionally, testing on surfaces before full application helps you understand how the flow improver interacts with different materials.
Why You’ll Love Using Flow Improver in Airbrushing

Ever faced the frustration of your airbrush clogging up right when you’re in the zone? It happens to the best of us, but there’s a handy trick to smooth out that ride—flow improver. This magic potion can really transform your acrylic paints, making them flow effortlessly through the airbrush and creating a gorgeous finish.
When you mix Vallejo Airbrush Flow Improver with your paint, you’ll notice things change for the better. Here’s how to do it: stick to the ratio of 1 part improver to 5 parts paint. This way, you keep that lovely integrity of the paint while enhancing its fluidity. You’ll find yourself dealing with far fewer bubbles and pinholes, which means less hassle for you.
The best part? This improver also extends your drying time. That slight delay can be a blessing, especially when you’re trying to blend colors or create intricate designs. Better adhesion and flow mean that airbrushing becomes a more enjoyable process, whether you’re a newbie or diving into finer details.
Truth is, using flow improver can elevate your painting game without much effort. Adding mediums with slow-drying properties like flow improvers provides extra time for blending and achieving smoother transitions. Have you tried it yet? It’s worth giving it a shot!
Select the Best Flow Improver for Your Medium

Selecting the right flow improver for your airbrushing project can feel a bit overwhelming, right? It’s important because the wrong choice can turn a fun painting session into a frustrating one. Start by checking if the flow improver, like Vallejo’s, is made specifically for acrylics. These types help lower surface tension, which means you’ll get a smoother application.
Don’t forget to go for a non-toxic, water-based solution. It’s safer for indoor use, and who doesn’t want to avoid those harsh chemical fumes? Make sure it’s compatible with your paint type; otherwise, you might not see the results you want. Vallejo suggests mixing in up to 30% flow improver to get the best results without messing with the quality of your paint.
Ever read user reviews before? They can really guide your decision-making. Hearing about real experiences can help you find the right flow improver that not only enhances paint flow but also boosts adhesion. This way, your projects will be not just productive but also enjoyable.
For optimal results, pairing your flow improver with ergonomic design considerations in your tools can reduce fatigue and improve control during application.
Recommended Products

Our most opaque white, made with Titanium Dioxide, is an essential white for most painters
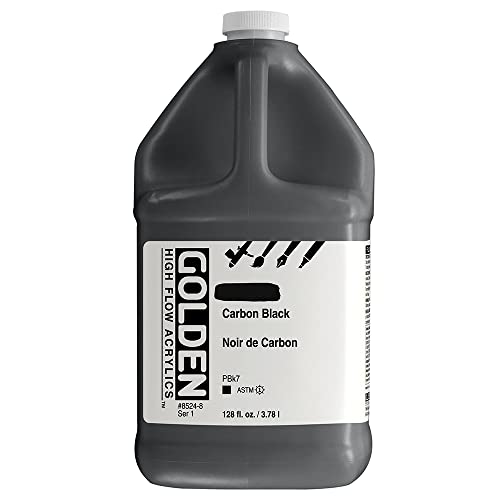
Produced with soot from burning gas the dark and fine particle size makes this our darkest most neutral black

Seamless Siphon Feed Connection: Experience effortless paint flow with the MIL Double Action Siphon Feed Airbrush, ensuring a smooth and uninterrupted creative process for your airbrush painting.
Mixing Flow Improver With Acrylics
Mixing flow improver with acrylic paints can truly change how your artwork comes together. You’ll notice a significant difference in the flow and leveling—this additive helps break surface tension, making those brush strokes much smoother. Here’s the trick: aim for a mixing ratio of 1 part flow improver to 5 parts paint. It’s important to be cautious, though; try not to exceed 30% flow improver in your mix. Otherwise, you might end up with cracking or flaking paint.
Consider adding the flow improver directly into your paint, or mixing it with water first, especially if you’re working in hot or windy conditions. So, why does this matter? It’s all about achieving that perfect consistency for your project. When you’re ready to start, make sure to test your mixture on a palette. This way, you can see how it behaves before diving into your artwork.
The best part is, adjusting the mix as you go can really help you nail the look you want. Just remember, what works for one piece might not work for another, so don’t be afraid to experiment a little.
In short, incorporating flow improver into your acrylics can enhance your painting experience. To ensure optimal results, it’s essential to use mediums that are compatible with paint brands to avoid unexpected texture or finish issues. What’s your go-to tip for achieving smooth applications?
Recommended Products

A transparent, brownish yellow at full strength but with enormous range. Excellent for creating rich amber glazes or extending further for high-pitched yellows. Tint with white for a bright, sunshine yellow

An intense, brilliant color produced from dye surrounded by a polymer coating. Glows under black light. Fluorescent colors are not lightfast. For greater permanency, apply varnish with UVLS (Ultra-Violet Light Stabilizers) - however, this will eliminate the glow under black light

A pearlescent effect is achieved with an extremely thin Titanium Dioxide coating on mica particles, creating the lightest iridescent color we offer
Common Airbrushing Mistakes With Flow Improver
How can you dodge common pitfalls when using flow improver in airbrushing? First off, keep that mix to about 30% maximum. Overdoing it with the flow improver can really dilute your paint, weakening the pigment’s punch.
Next, don’t forget to mix the flow improver well with your paint. If you skip this, you might end up with uneven application or a stubbornly clogged airbrush nozzle. And let’s talk about the weather: hot or windy days can ruin your flow by speeding up drying times, leading to those pesky streaks we all dread.
When it comes to cleaning your airbrush, being quick is key. It’s way easier to clean right after you’re done, preventing any gunky buildup. Lastly, always mix your flow improver directly with the paint. Using water instead can seriously impact how well your artwork sticks and lasts.
To maintain consistent flow and avoid clogs, regularly use an airbrush cleaning kit designed with the right brushes and needles for your airbrush model.
Recommended Products

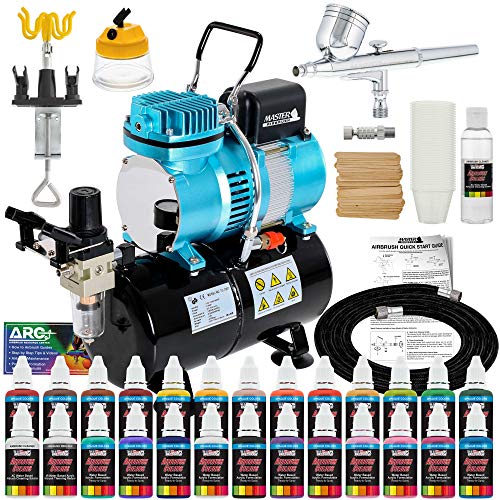
Professional Master Performance Acrylic Paint Airbrushing System with an Iwata Brand Model HP-CS Eclipse Dual-Action Gravity Feed Airbrush Set along with a U.S. Art Supply Water-Based Acrylic Airbrush Paint Kit with 12 Popular Primary Opaque Colors in 1 oz. Bottles plus Reducer and Cleaner.

TC-326T Compressor: Features the Cool Runner II 1/5 hp single-piston compressor. The 3 liter air storage tank allows constant air pressure and zero pulsation.
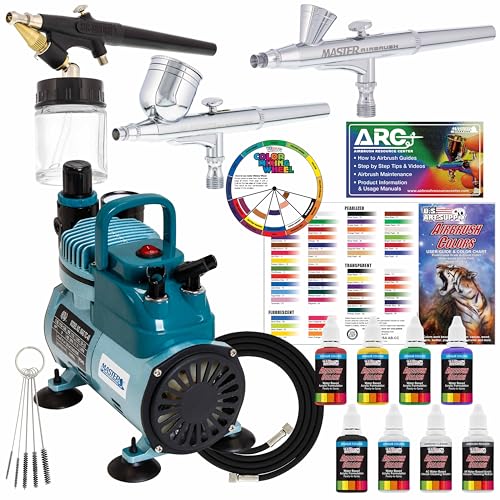
Professional Master Performance Acrylic Paint Airbrushing System with a multi-purpose G22 precision dual-action gravity feed airbrush with a 0.3 mm tip and a 1/3 oz. gravity fluid cup. Includes bonus Master Airbrush Quick Start Guide and Airbrush Resource Center Access Card.
How to Use Flow Improver in Different Painting Styles
When it comes to painting, flow improver is one of those handy tools that can really make a difference, and knowing how to use it in different styles is super important. If you’re into airbrushing, try mixing 1 part flow improver with 5 parts paint. This ratio helps keep your colors even and flowing smoothly—nobody wants to deal with unexpected drips or clogs!
For watercolor techniques, mixing flow improver with water can work wonders. It enhances how the paint interacts with the surface, especially if you’re painting on absorbent materials like watercolor paper. Don’t be afraid to step away from the typical 30/70 thinning rule; experimenting can lead to wonderful results.
Ever struggle with tricky colors? Think thick blues or deep reds. Adding a bit of flow improver can reduce annoying tip-dry issues and stop splattering in its tracks. It makes your painting experience much smoother, letting you focus on the fun part—creating!
What’s great is that flow improver can also extend your drying time. This longer working period is perfect for blending colors and achieving that expert finish. Honestly, it takes the stress out of rushing through your work.
For acrylic pouring, using a medium with the right viscosity and flow consistency can help achieve distinct cell patterns and minimize cracking.
Recommended Products

Set Composition: Includes six dual-action siphon feed airbrushes with individual 3/4 oz fluid bottles and 0.35 mm tips, providing multiple tools for continuous studio work.
Professional Master Airbrush Acrylic Paint Airbrushing System with 3 of Master Airbrushes best selling & user friendly airbrushes. Includes bonus How-To-Airbrush Manual & Guide Booklet by Master Airbrush.

Powerful Spray Booth: The MEEDEN airbrush studio features powerful dual exhaust fans with a 4.1 cubic meter per minute airflow suction. It also comes with detachable and replaceable high-density sponge filters that effectively absorb particles and fumes, ensuring a healthier and cleaner workspace
Real-World Applications of Flow Improver From Artists
Have you ever struggled with your paint drying too fast while you’re trying to blend colors? If you’re an artist, you know how frustrating that can be. That’s where flow improver comes in handy. It’s especially great for those who want smoother application and a little more fluidity in their work across different mediums.
For airbrushing, flow improver is like a secret weapon. It reduces surface tension, which cuts down on those annoying bubbles that can ruin your paint job. You’ll notice that your paint flows consistently, even if you’re working at different pressures. Plus, if you’re into fluid art, this stuff extends your working time, making color blending a breeze without the worry of drying too quickly.
When it comes to layering techniques, using flow improver can really save your bacon. It helps with adhesion, so you don’t have to deal with paint lifting off when you start adding more layers. If you love working with watercolors, you might be excited to know that it can help acrylics mimic that translucent effect typical of traditional watercolors.
And here’s the best part: there are non-toxic options out there, like those from Vallejo. Staying safe while enhancing your art is a win-win. Honestly, incorporating flow improver into your routine can lead to some incredible outcomes.
Different flow improvers are optimized for specific uses, so choosing one suitable for your technique, like airbrushing or pouring, can significantly improve your results by reducing issues like paint blushing or clogging with application type compatibility.
Have you tried it yet? If not, give it a shot, and you might just find your next best art buddy!
Troubleshooting Flow Improver Issues in Airbrushing
Are you struggling with your airbrushing due to flow improver issues? You’re not alone! While flow improver can really boost your painting experience, it’s not without its quirks.
If you’re noticing your paint isn’t sticking like it should, it might be time to rethink how you’re mixing it. Remember, try to keep that flow improver to a maximum of 30% in your paint mix. Going beyond that can lead to some unwanted cracking or flaking, which nobody wants to deal with. And speaking of mixing, make sure your flow improver is well-blended. If you see bubbles or pinholes in your work, that could be a sign it’s not mixed enough.
Let’s talk about the environment. Have you noticed how higher humidity affects your paint? In those conditions, you might want to dial back the flow improver. Too much can overly dilute your mix, making things tricky.
Cleaning your airbrush after using flow improver can feel like a hassle, but just trust me on this one. It’s essential! Regular cleaning helps prevent clogging and keeps your airbrush performing like a champ. Using cleaning accessories included in many kits can make this process quicker and more effective.
Best Practices for Storing Your Flow Improver
Storing your flow improver properly is super important for keeping it effective. You know that feeling when you open a product and it just doesn’t work the way it should? That’s what we want to avoid! So, how do you make sure it lasts?
First off, find a cool, dark place for it. Heat and light can really mess with its quality—who wants that? It’s also smart to keep the container tightly sealed when you’re not using it. This little habit helps prevent evaporation and keeps out anything that might mess with its performance.
Humidity can be a real enemy too. Avoid storing your flow improver in spots where the air is damp or where temperatures fluctuate a lot. These conditions can alter its consistency, and that’s not ideal for your projects. You don’t want to be midway through a creative endeavor only to discover your flow improver isn’t cooperating.
Using original packaging or clearly labeled containers can help you spot it easily when you need it. Trust me, there’s nothing worse than rummaging around looking for supplies! And don’t forget to check the expiration date from time to time. If you notice any weird changes in the product, it’s best to dispose of it.
Good storage practices can really make a difference in the quality of your artwork. So, are you ready to give your flow improver the care it deserves? Remember, just like multiple coats of gesso improve surface quality, paying attention to storage details ensures your materials perform their best.
Frequently Asked Questions
How to Use Airbrush Flow Improver?
To use airbrush flow improver, we mix one part improver with five parts paint for fluid consistency. Let’s always test our mixture on a palette before applying, ensuring ideal results in our airbrush techniques.
How Much Airbrush Flow Improver to Use?
Imagine crafting a fine potion; we’d recommend a 1:5 ratio of flow improver to paint. Let’s avoid common mistakes, like exceeding 30%, ensuring our creations flow smoothly without cracking or flaking.
Is Flow Improver the Same as Pouring Medium?
No, flow improver isn’t the same as pouring medium. While flow improver enhances paint flow for applications like airbrushing, pouring medium guarantees a smooth, pourable consistency for fluid art. Each serves a unique purpose in our projects.
Is Reducer the Same as Flow Improver?
No, a reducer isn’t the same as a flow improver. Reducer types thin paint for application, while flow improver benefits include enhancing flow without altering viscosity, helping us achieve smoother, more detailed results in our art.


